6 months ago, after performing a great deal of research, I ordered a trackball-equipped custom Dactyl Manuform keyboard from Wylderbuilds (see my previous article for my rationale). 3 months ago, I received the keyboard and I’ve been using it ever since. Overall, it’s been a good experience – I learned a great deal, I’ve had a lot of fun, and I feel better too. I believe that this type of keyboard would be great for those who want something that just works (as it works great simply plugging it straight out of the box) as well as those who like to tinker (there are limitless customization options).
- Receiving the Order
- The Keyboard’s Hardware Components
- Build Quality
- Key Switches
- Keycaps
- Palm/Wrist Rests
- The Keyboard’s Interface: Ortholinear, Wells, Rows/Columns, Thumbclusters, the Trackball, the Encoders, and the Screens
- Key Mapping / Layout
- Learning the Layout: Improving Accuracy and Speed
- Overall Review
- Potential Next Steps: Wireless and Chair Mounting
Receiving the Order
The order took a bit longer to receive than I expected, taking ~4 months to arrive; I placed the order on August 31 and it arrived on January 22. However, I cannot place much blame on Wylderbuilds for these delays, as I placed an order for a wireless keyboard with the understanding that wireless is a cutting-edge feature that wasn’t yet available.
Wylderbuilds offered to upgrade my keyboard to RGB for free if I accepted an additional one-week delay, which I gladly accepted. I don’t care enough for RGB to pay money for it, but accepting a short delay in exchange for some blinkenlights seemed like a good deal.
Wylderbuilds provided updates on the keyboard as it was being produced and was always responsive via email and Discord.
In November, my Microsoft Natural keyboard suddenly stopped working – it just did nothing. I changed the battery and looked it over… there was nothing that I could see as being wrong, it just did nothing. There are no lights on the keyboard; any further debugging was beyond my rudimentary capability (or willingness to invest time). A friend lent me a Drop CTRL keyboard with Halo True switches so I started using it. Those Halo True’s are very heavy switches.
On January 16, Wylderbuilds offered to ship me the keyboard in a wired (non-wireless) configuration. I happily took them up on that offer. Wylderbuilds would later send me a kit to upgrade the keyboard to wireless on my own, with assurances that it should be easy for me to do; if I ran into trouble, Wylderbuilds would provide support via Discord with the option for me to ship the keyboard to them for them to finish off. I haven’t received that kit yet, but I’m ready to get my hands dirty installing it when I do.
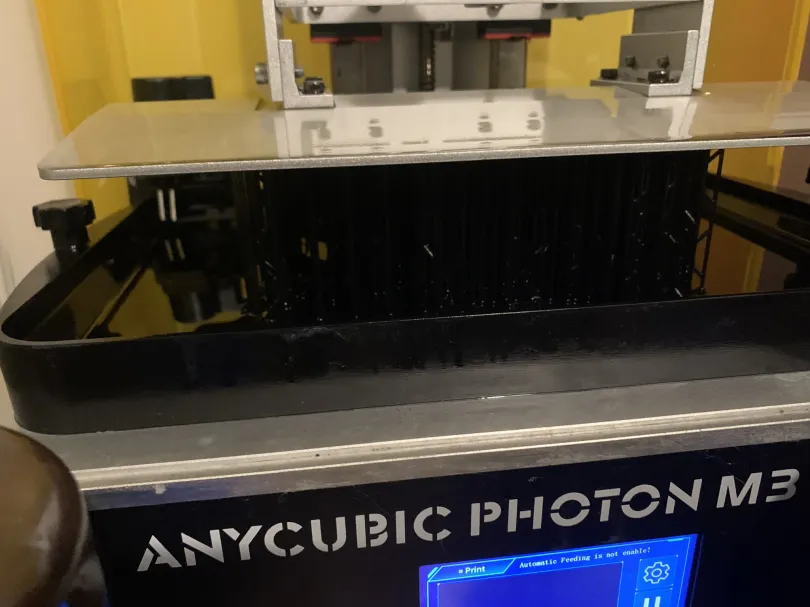
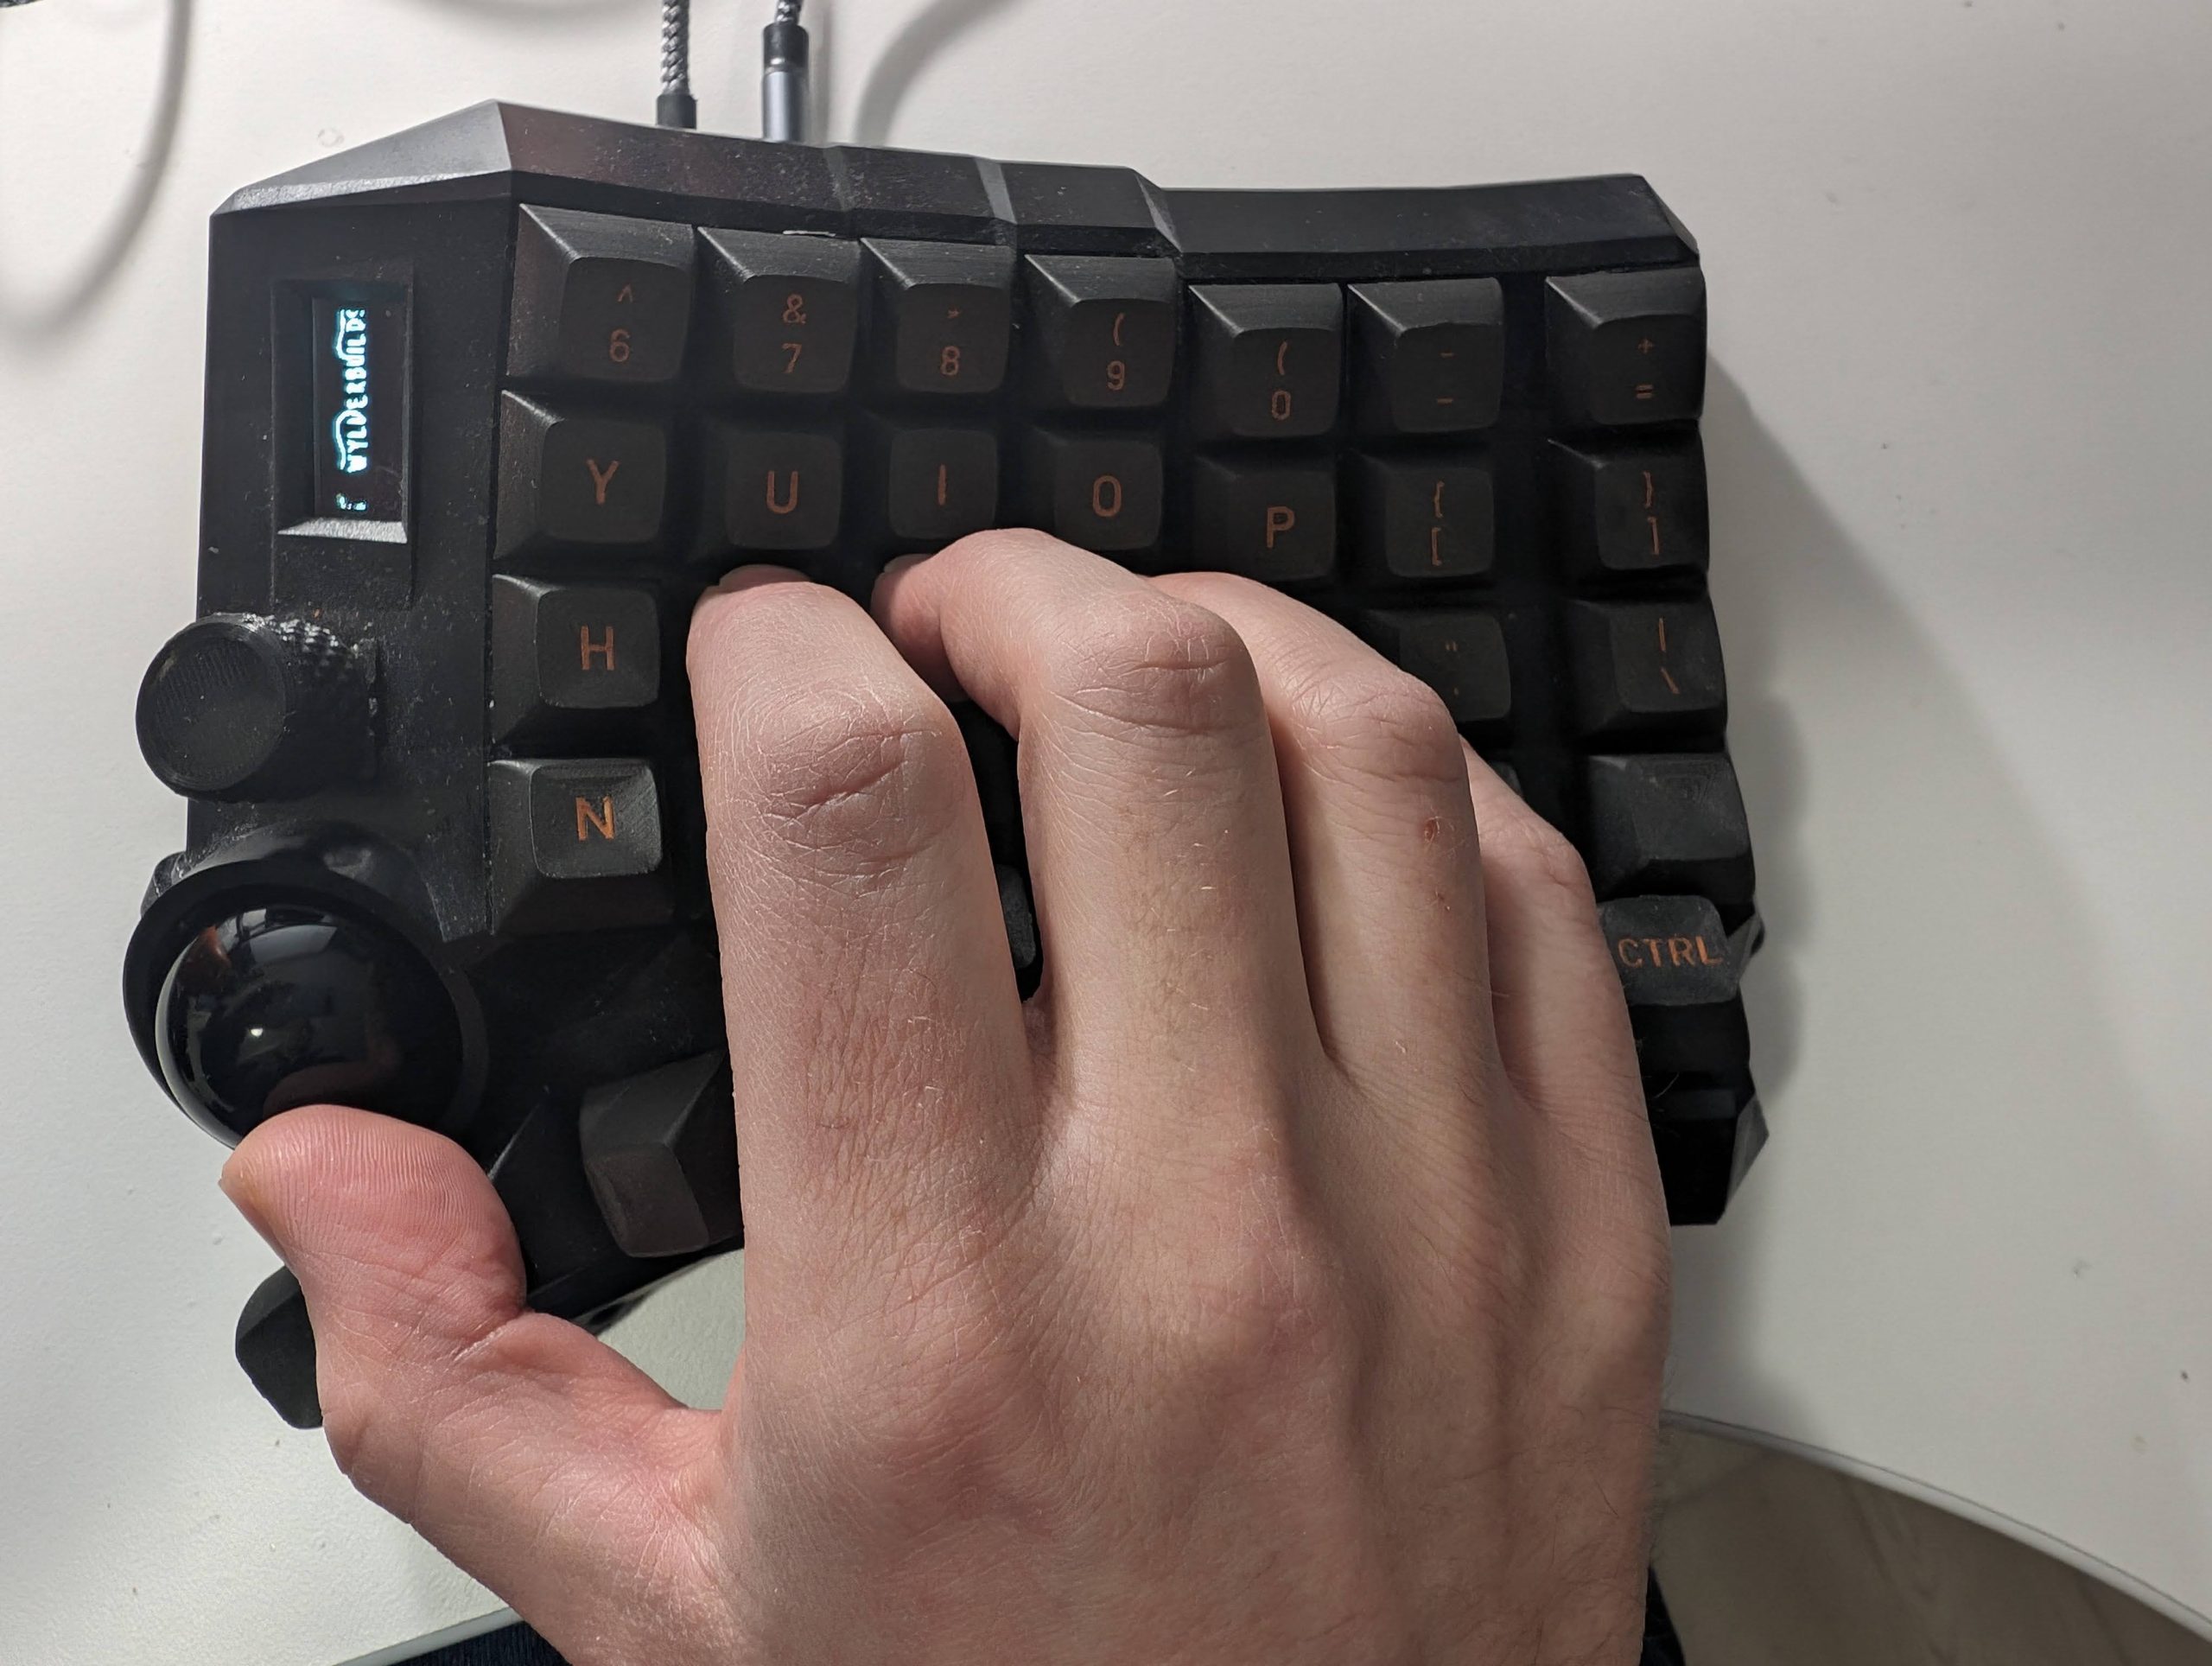
The keyboard arrived nicely packaged with plenty of padding on January 22. I plugged it and it immediately worked, lighting up and showing the Wylderbuilds logo scrolling on the right half’s OLED display. Besides the two keyboard halves, the package included two gray braided USB cables: one C to A for plugging the keyboard into the computer, and one C to C for connecting the halves.
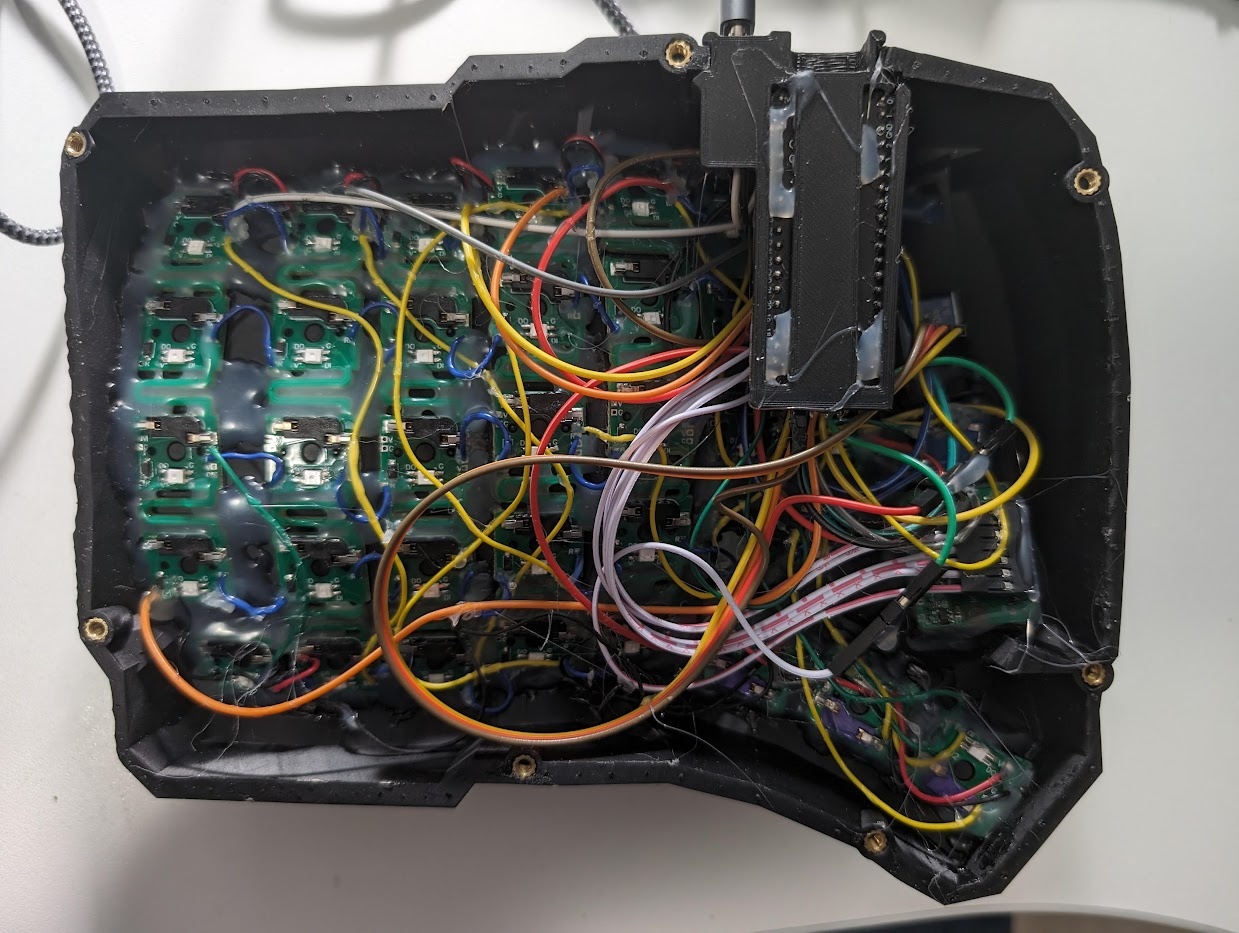
The Keyboard’s Hardware Components
- PMW 3360 trackball sensor
- 34mm trackball
- 3mm x 6mm dowel steel rods as axles for the trackball bearings
- USB C between the halves and to the host
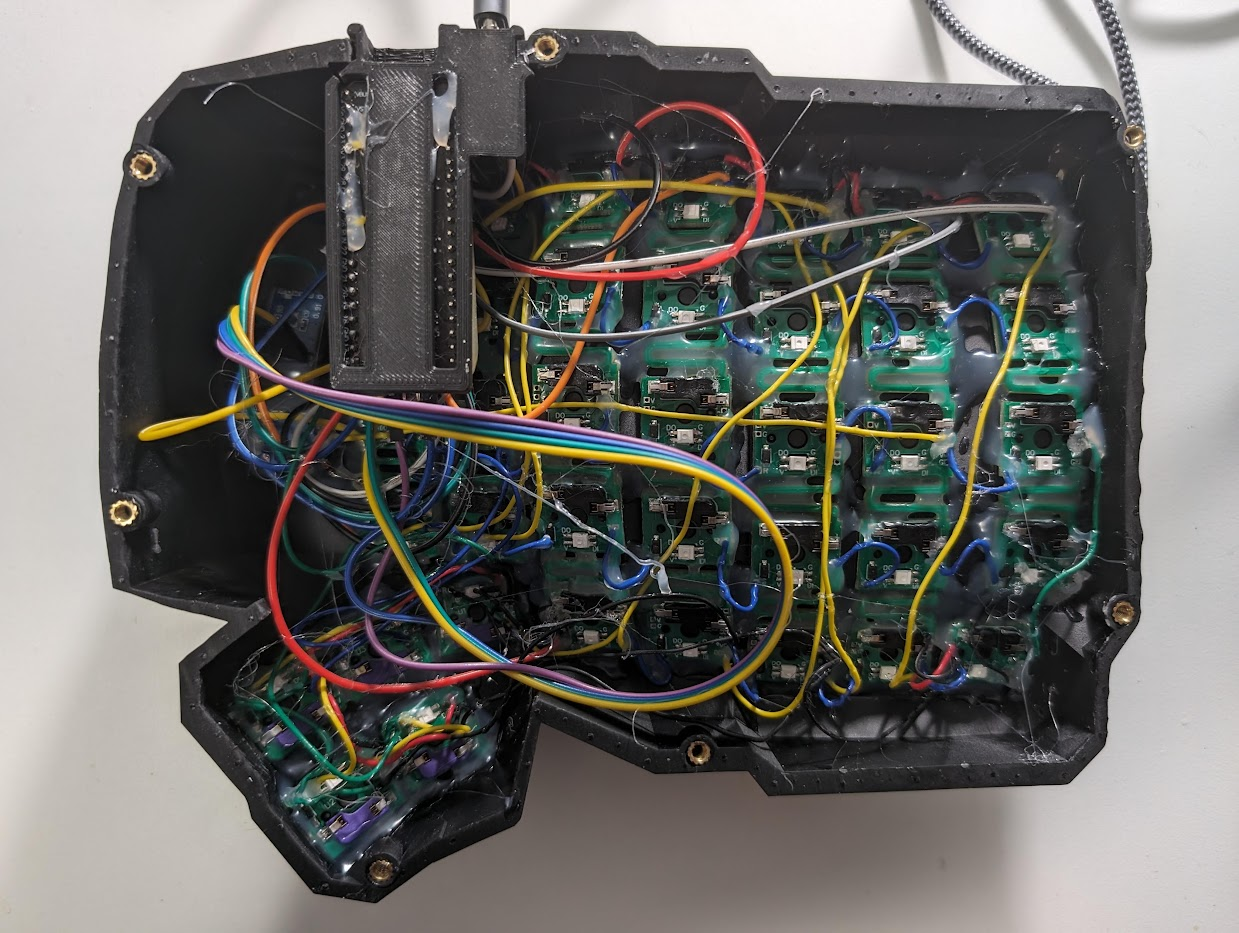
- 2 Raspberry Pi Pico clones with 4MB flash (one in each half of the keyboard)
- 2 OLED screens
- Skree Flexible PCBs
- 2 rotary encoders
The wireless upgrade kit I anticipate receiving soon will replace the trackball sensor with a lower-power one and the microcontrollers with wireless-capable ones.
Build Quality
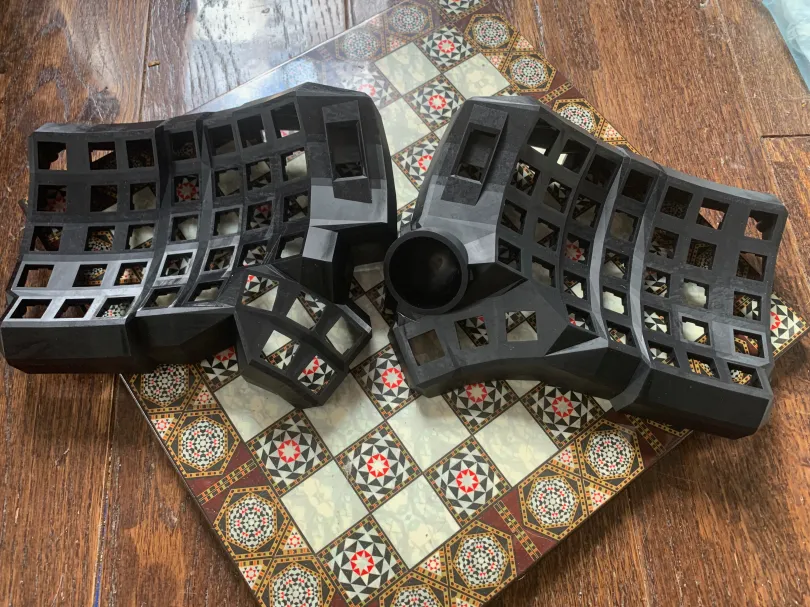
I understand that this keyboard is a one-of-a-kind, custom-built, 3d printed device and therefore won’t have the impeccable build quality of a mass-produced, injection-molded item. And if you choose to order such a device, you need to be aware of that too.
The keyboard works great and generally looks good. But it is not visually flawless. I paid extra for the premium resin printed case option expecting a higher quality piece, more ready for show than the FDM printed one. However, on the left half, the left rear standout area is malformed. I believe that this deficiency is the only one, and it’s not in a super visible location, so it’s okay… but certainly not great. In fairness, Wylderbuilds raised this issue to me and I did say it was okay, but at the time I had waited months for this keyboard, and I honestly really wanted it; the cost of receiving a visually imperfect device was worth it to not wait weeks or months longer to me.
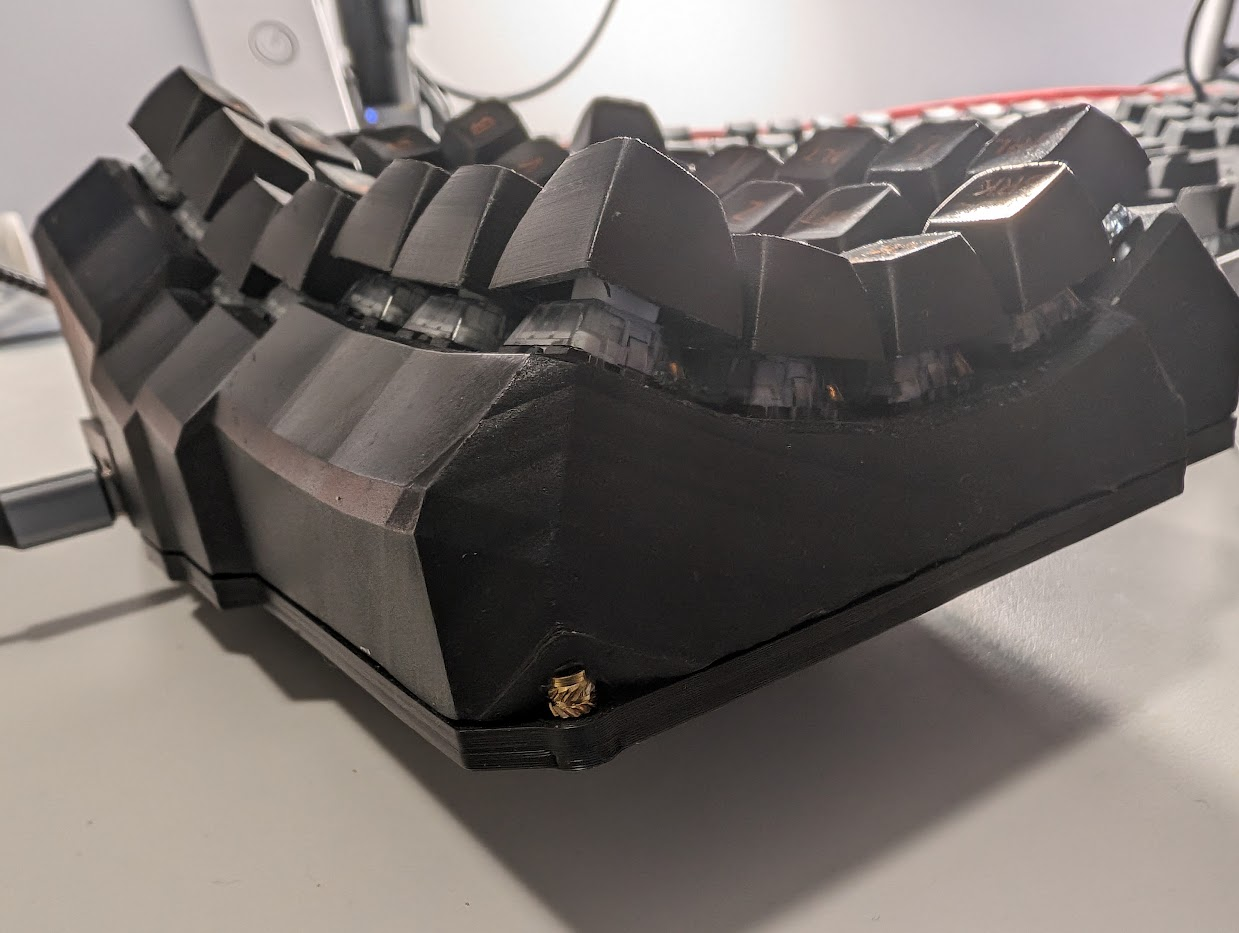
Other than that one minor issue, the keyboard looks great. Overall, I’m quite happy with its appearance and build quality.
Key Switches
Key switches are an incredibly personal choice; what one person loves another may hate. I’ve always wanted to try clicky switches due to my fond memories of using IBM Model M keyboards back in the day. So I ordered a switch tester with many different switches, played with it for a bit, and settled on Kailh Box White v2 switches. I liked the sound, the feel, and the weight (I thought the famous Kailh Box Navy and Jade switches were too heavy). So I ordered a bunch and they arrived in plenty of time to be put into the keyboard.
Keycaps
Having never used a modern mechanical keyboard except for the Drop CTRL that was loaned to me, I didn’t know much about keycaps. I learned that the Drop CTRL comes with OEM keycaps. I saw that many Dactyl keyboards use uniform profile keycaps, such as DSA. But, lately, sculpted profiles appear more popular for Dactyls, particularly MT3 (Wylderbuilds, for example, sells MT3 keycap sets for Dactyls) and SA. In short, there are many options, limitless opinions, and no objectively best choice.
In October, I got a 3d printer, specifically the Bambu Lab P1S with AMS. So instead of ordering a keycap set, or a few keycap sets to try out different ones, I decided to print my own keycaps.
To learn more about my experience 3d printing keycaps, including pros, cons, challenges, and solutions, please see my article at https://candrews.integralblue.com/2024/03/3d-printing-high-quality-keycaps/ If you apply the knowledge I shared, you too can produce some great look, good feeling, truly unique keycaps.
After trying a few keycap options, I settled on MT3 (at least for now!):
Having used this configuration for a few weeks now, I can say that I like it. It’s comfortable, sounds nice, and looks nice. What else can one ask for?
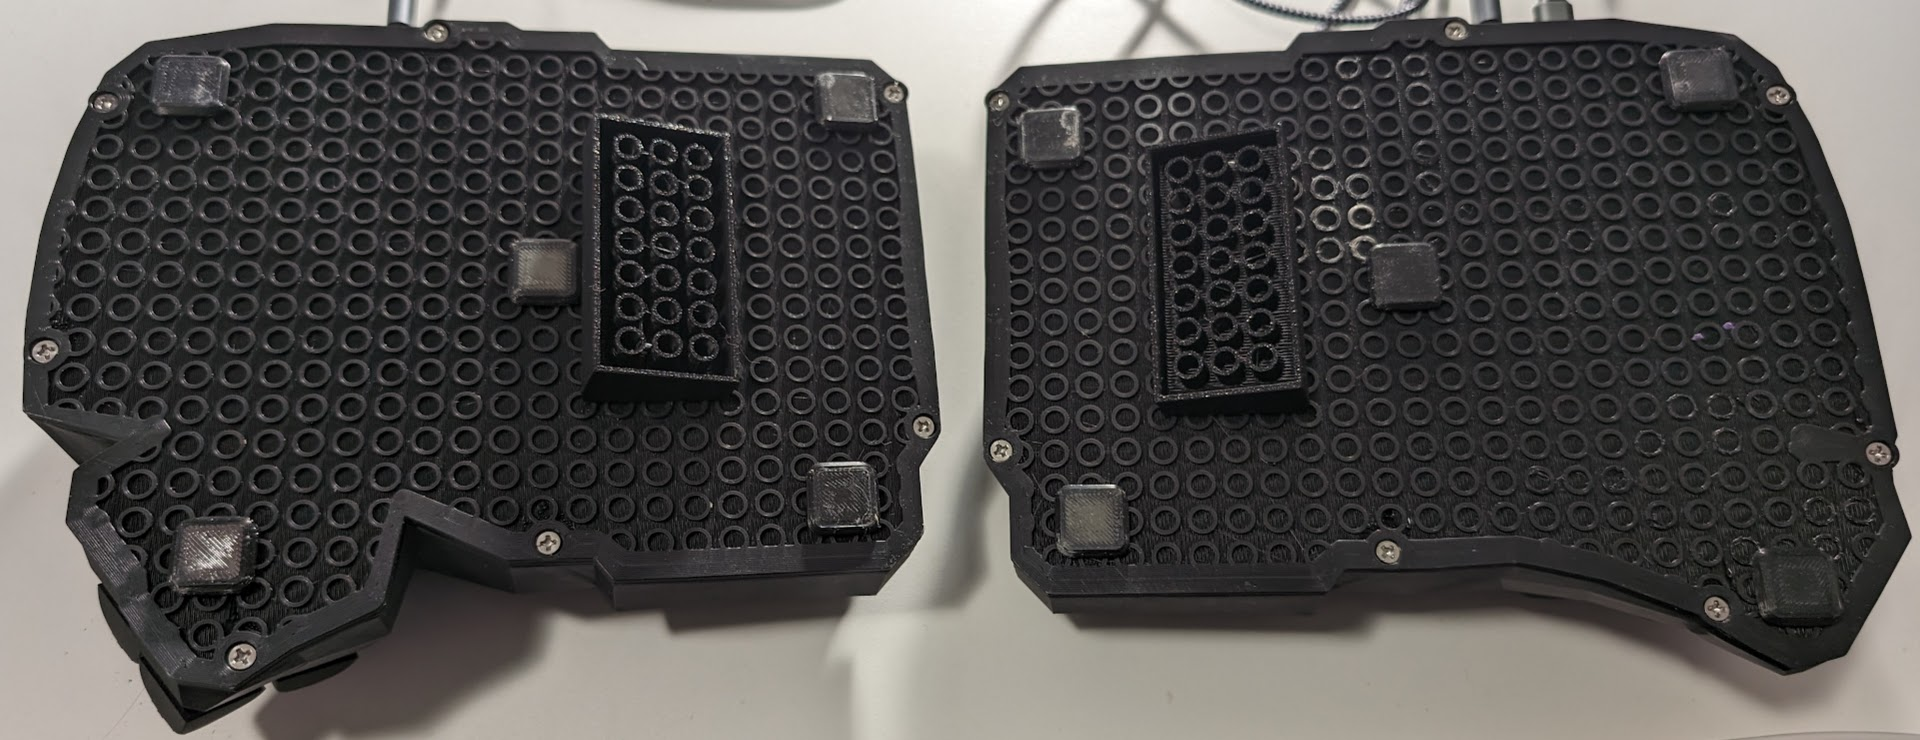
Palm/Wrist Rests
There’s a lot of science behind ergonomics, but unfortunately not a lot in the area of these types of keyboards. So like switches and keycaps, it’s down to individual preference (within the limited constraints of the limited scientific knowledge available).
Let’s start with the palm rest.
You (probably) do not want to use wrist rests. Wrist rests sit under the wrists, and as such, they can reduce circulation by compressing the blood vessels of the wrists, causing numbness and eventually other more severe problems such as Carpal Tunnel Syndrome (CTS). However, wrist rests can reduce shoulder and neck pain… but there are other ways to mitigate that pain that don’t risk CTS. So note that I’ve been careful to use the term “palm rest,” which stresses that the rest goes under the palm, never the wrist.
I originally felt strongly about and wanted palm rests, primarily because I’ve always had some form of palm rest, specifically the one built into the Microsoft Natural keyboards. So I ordered some jelly palm rests and their holders along with my keyboard and started using them. And after just a few days, I decided I didn’t like them. They didn’t seem comfortable. And I kept inadvertently using them as wrist rests. So, I stopped using them and started using the “floating hands” method.
Initially, floating my hands was challenging. I found that maintaining correct posture was more important using this method than using palm rests; otherwise, neck and shoulder pain seems to be more likely to occur. But over a bit of time, and with some practice, I’ve come to get used to floating my hands.
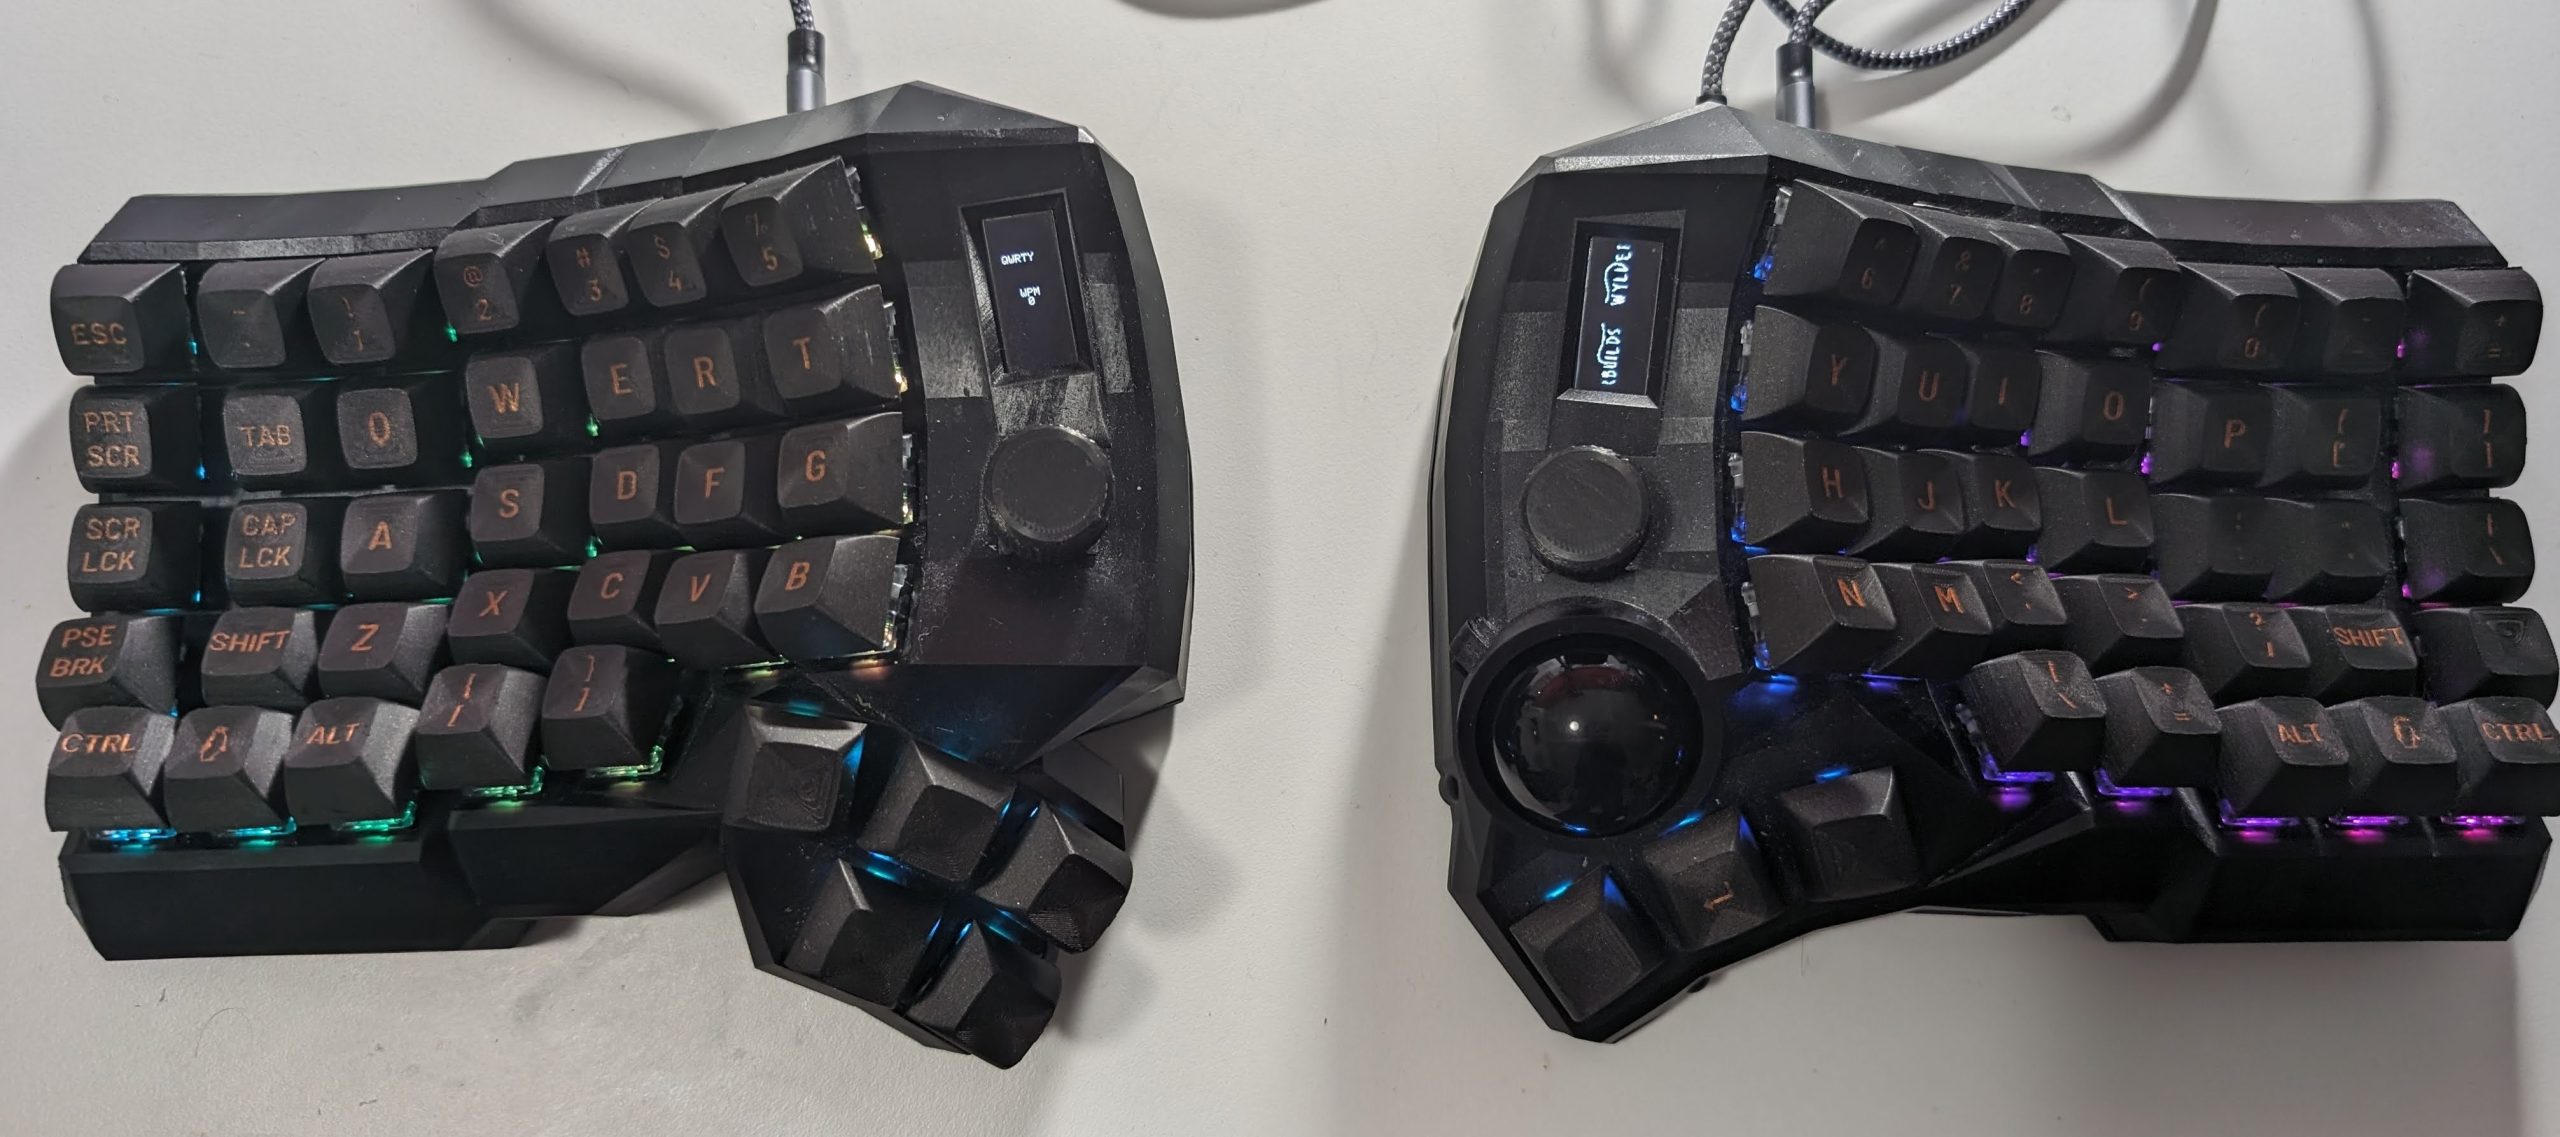
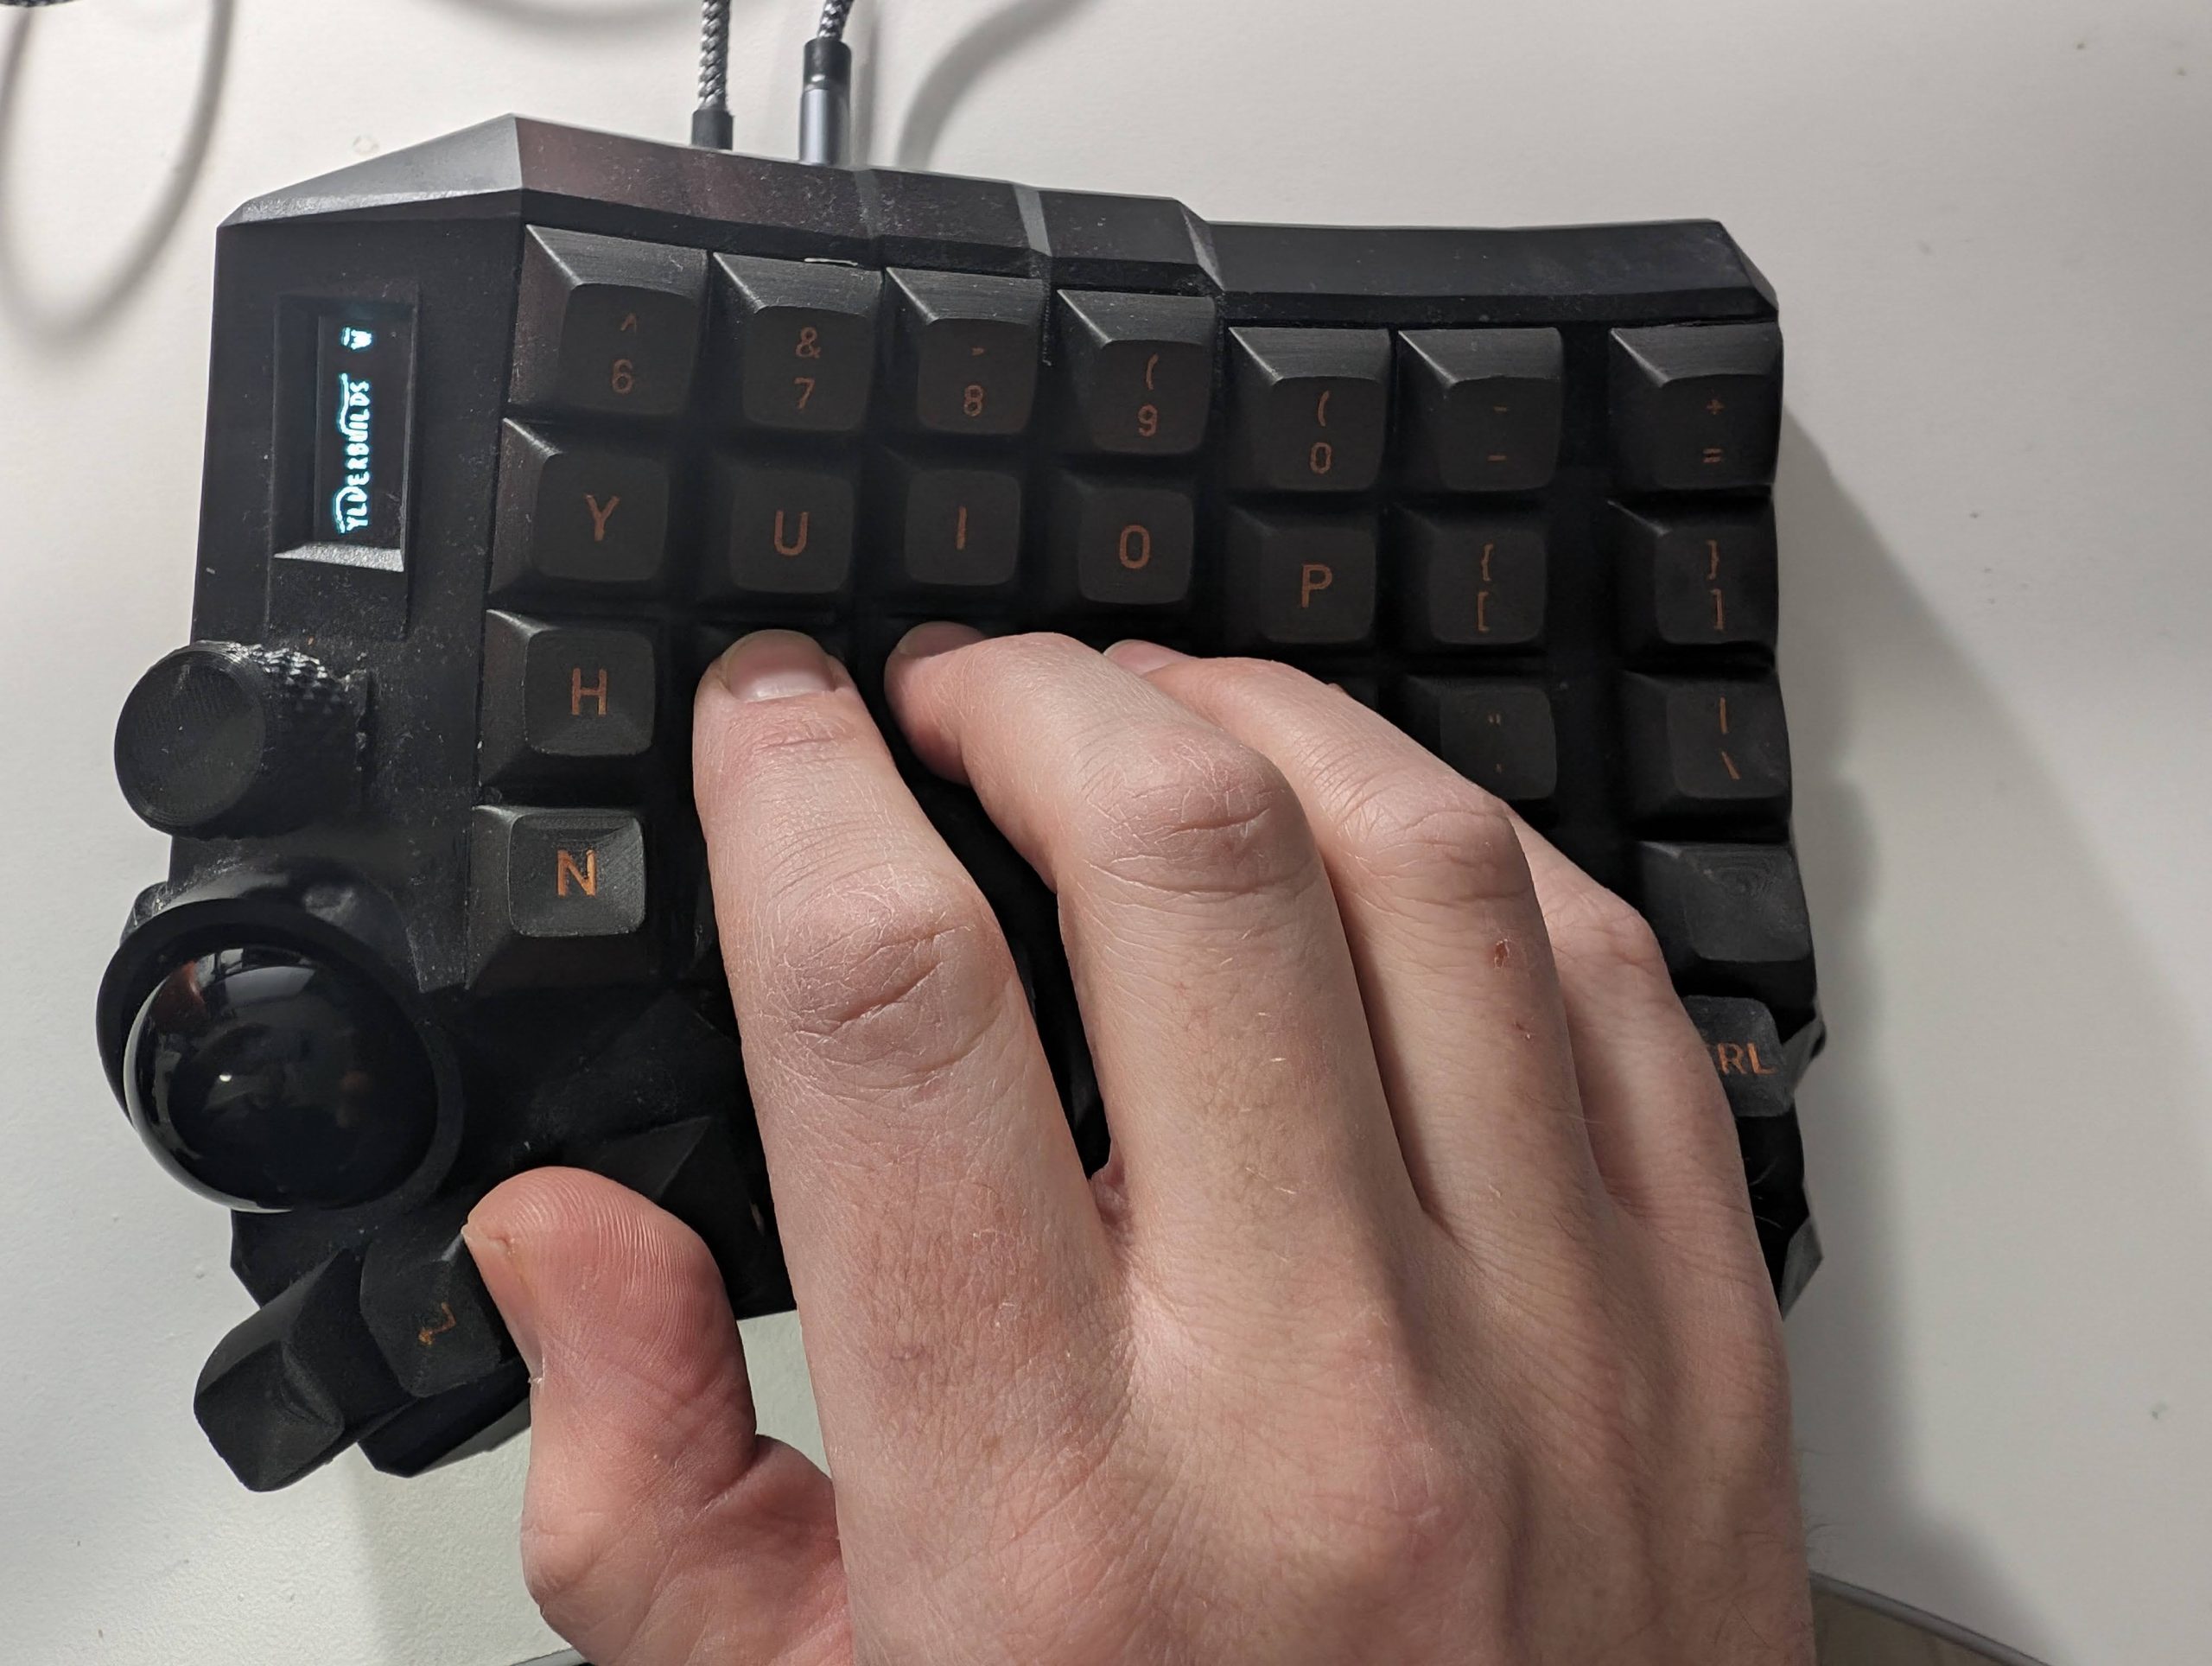
The Keyboard’s Interface: Ortholinear, Wells, Rows/Columns, Thumbclusters, the Trackball, the Encoders, and the Screens
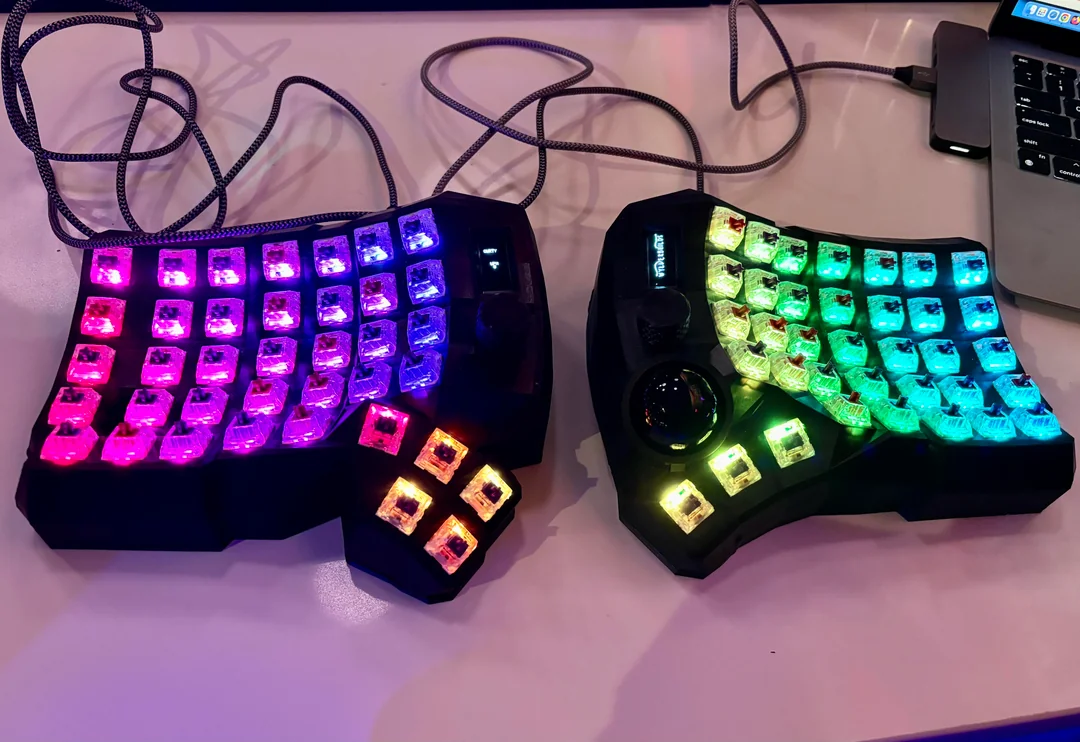
The keyboard is very comfortable. The ortholinear layout is very comfortable and intuitive; it didn’t take me long to get used to it.
The key wells are similarly an intuitive, unquestionable improvement over flat keyboards. However, if I were to get another keyboard, I’d have deeper, more concave wells. I have some trouble reaching the number row and the out two columns; I suspect that with a deeper well, I could more easily reach the number row and the 6th column.
Thumb clusters are great – it’s revolutionary to have so many more keys suddenly always available instead of losing two digits to just the space bar. My left thumb cluster is a “Mini” 5-key Thumb Cluster. I can reach and use all 5 keys comfortably. I wish I had 6th key though, and I know I could reach it too. I think the Carbonfet 6-key Thumb Cluster would be better. On the right, I have the Wyld 3-key Trackball Cluster. I can only comfortably reach 2 of the 3 keys (the leftmost key is hard to reach so I use it rarely). I suspect the 3-key trackball cluster would be better as I’m confident I could reach all 3 keys with that design.
The trackball is wonderful. It’s a real pleasure to switch between typing and pointing quickly and effortlessly in stark contrast to using a separate mouse or trackball. My hands very rarely need to leave the home position giving me a feeling that I can only describe as being fun and liberating.
After a few weeks of use, the trackball did start to get a bit… weird. It felt hard to get moving like it had a high coefficient of static friction but still a low coefficient of kinetic friction. The problem was actually very simple to resolve and endemic to all trackballs: it needed to be cleaned. I used soap to clean the trackball, IPA on q-tip to clean the rollers, and then some Non-Stick Dry-Film Lubricant on another q-tip to lubricate the rollers and the trackball is now back to working great. I think a couple of minutes of maintenance every few weeks is a worthwhile cost.
My keyboard has a lot of keys – 72 (plus a trackball) to be exact. I initially thought that more was better, but now that I’ve used the keyboard for a bit, my opinion on that topic has evolved. From the home position, I can comfortably reach many keys, but I cannot reach the outer columns. And the bottom row is reachable, but very error-prone (I frequently miss and press the wrong key or multiple keys) and slow. So if I were to get another keyboard, I think a 4×6 Full Matrix would be more appropriate than my 5×7 Full Matrix.
I have two encoders, one on each half. One controls the volume and can be pushed to mute; I use this encoder frequently. The other I’m not entirely sure what to do with it; I currently have it configured to scroll, and I don’t use it very much. I could get away without encoders, but I do like my volume control knob… so perhaps in a future iteration, I’d go with one encoder instead of two.
Finally, the screens. I have two OLED screens which are fully controllable by the firmware, so I could customize them to do anything (QMK has Raw HID capability so you could run/develop software on your computer that sends anything to the keyboard to display). Wylderbuilds ships the firmware showing the current layer and a words per minute display on the left and the Wylderbuilds logo scrolling on the right. As it stands, I don’t find either display to be useful, and thus far, I don’t have any ideas on how I could use them in any useful way. In short, thus far at least, the OLED displays are analogous to RGB: they look cool but that’s it.
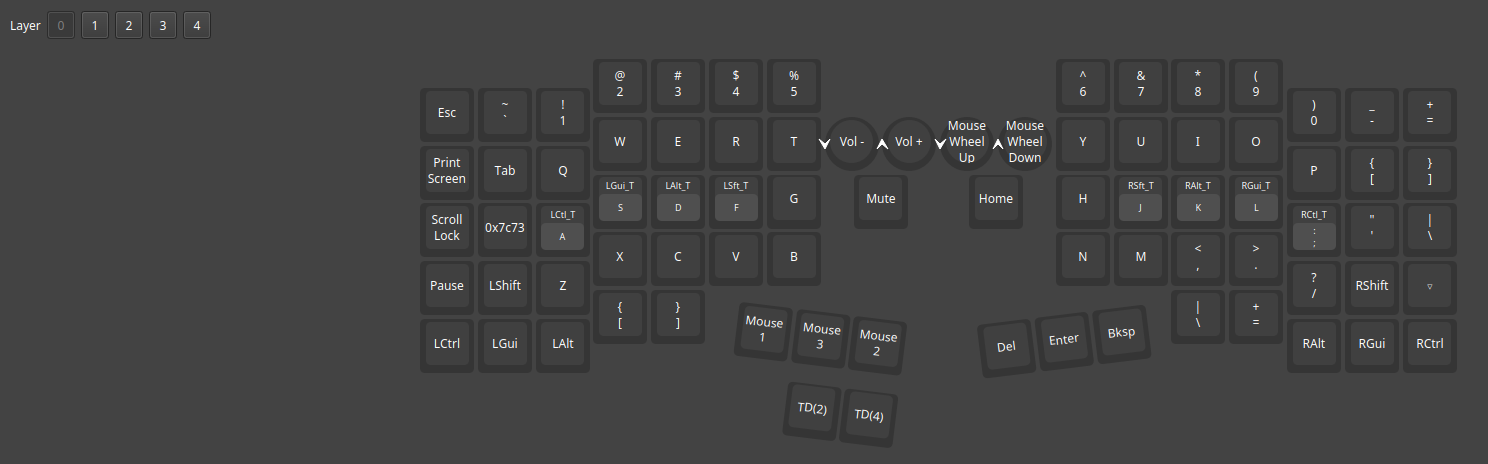
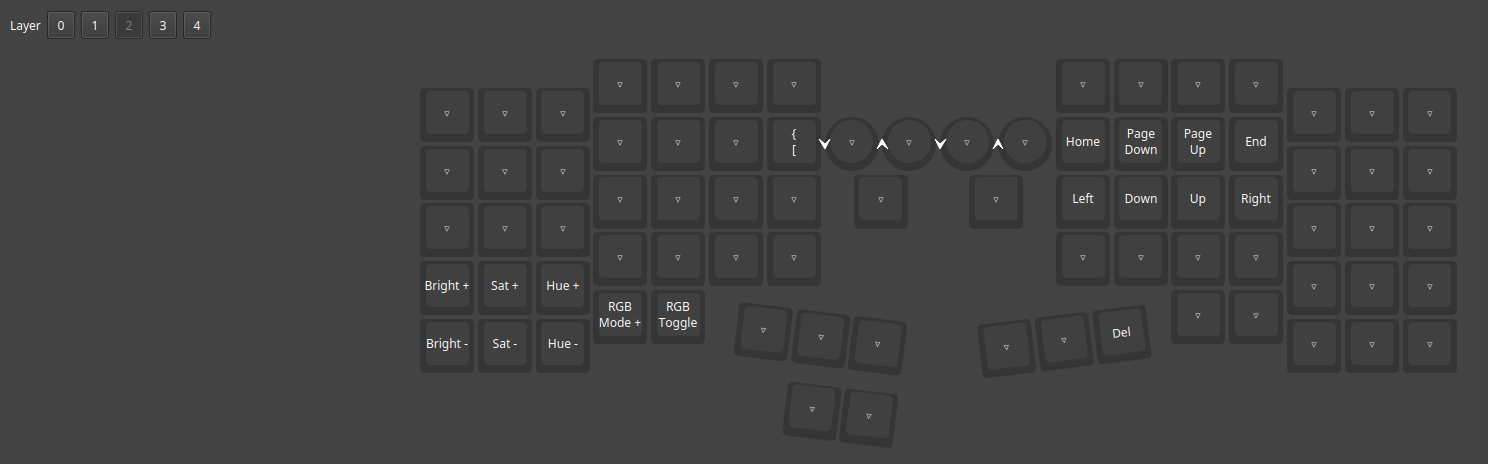
Key Mapping / Layout
My keyboard runs Vial QMK, which means it gets all the power of widely used QMK plus a nice GUI in the form of Vial allowing instant layout changes without having to flash the keyboard.
Wylderbuilds includes a link to a GitHub tag for the exact Vial QMK software initially installed on the keyboard; here’s mine for example: https://github.com/bullwinkle3000/vial-qmk/tree/squarespace_00156. Note that the firmware installed on the keyboard was great and very useable, and you only need to build and flash new firmware if you want to do customizations beyond what Vial allows.
I initially tried to treat the keyboard as a “normal” keyboard without layers or anything else “fancy.” And I quickly ran out of keys. 72 is a lot of keys, but still less than the 87 found on a typical TKL. So I started diving into layers and immediately found myself overwhelmed and in dire need of more knowledge.
I came across Miryoku, an ergonomic, minimal, orthogonal, and universal keyboard layout. I gave it a try but found it very hard to learn, and it didn’t take advantage of all the keys available to me. So instead I used Miryoku as inspiration for my own layout and started experimenting.
- I tried home row mods and immediately loved it. I’m using the CGAS ordering as that’s what a normal keyboard uses and I wanted to lessen my learning curve at least a little bit.
- I kept having accidental modifier activations so I added Achordion and configured it so modifiers only activate key presses on the opposite hand. For example, to press ctrl-s, I have to hold “;” and “s” – holding “a” then “s” will not work (that will simply type “as”).
- Automatic Mouse Layer (aka “automouse) activates a layer when the trackball moves and deactivates when it stops moving. Initially, it sounded like a great idea. Still, in practice, the mouse layer activation/deactivation never aligned with how my mental model and muscle memory thought it should work resulting in many misclicks, typos, and general frustration, so I disabled it in favor of assigning dedicated keys for the left, middle, and right mouse buttons.
- I have the mouse buttons (left, middle, right) in the left thumb cluster, and below them space and escape (great for vi!).
- The “space” and “escape” keys are tap dances that activate layers 2 and 1 respectively when held.
- The space and escape keys also enter scroll and snipe modes for the trackball respectively. If I want to scroll, I hold down the “space” key then move the trackball. Similarly, when holding escape, the trackball moves the cursor much more slowly allowing precise movement.
- Another great feature I’m using is caps word which is similar to caps lock but much better.
Some of these features aren’t (yet) supported by Vial so I had to customize Vial QMK and flash that to the keyboard. My fork is available at https://github.com/candrews/vial-qmk
Learning the Layout: Improving Accuracy and Speed
I’ve never been a particularly good typist, which I’ve always found amusing considering how my profession (software engineering) requires so much typing. So take my thoughts here with a decent grain of salt.
https://www.keybr.com/ is a fantastic way to practice typing. It drills key by key, not moving on to the next key until the current one is mastered. I found these exercises to be great for developing muscle memory, especially as I developed the keyboard layout and moved things around. It was also handy for testing home row mods and tap dance tapping terms (I’m currently using 150ms) and other configuration changes.
Once I had all the basic keys mastered, I moved on to Monkey Type. This tool helps test complete sentences so it’s more realistic than keybr.com. It can also test numbers and punctuation.
At this point, I’m up to about 70 wpm with numbers and punctuation in Monkey Type which is roughly where I am with a standard QWERTY TKL keyboard. And I have to say, typing on the Dactyl is such a more fun experience than the TKL too.
Overall Review
The keyboard is comfortable, fun to use, and looks interesting. The learning curve was and continues to be significant, but it’s been an entertaining challenge. Until this point, the keyboard has been a static piece of hardware, not customizable, not flexible, and not personalizable. But now, with this keyboard, everything has changed: much like the computer’s software, I can now customize everything about the keyboard from the switches and keycaps to what’s displayed on the screens to the key mapping. This changes my whole perspective on the keyboard from being a device that I have to change myself to accommodate to instead being a device that I can change to accommodate me.
Regarding comfort, I find the Dactyl Manufrom to be quite comfortable. I haven’t experienced any thumb or finger discomfort and my wrists haven’t lodged any complaints either. Especially for my wrists and fingers, this change has been very positive. The split nature allows placing the two halves shoulder width apart, which feels more comfortable and facilitates sitting up straighter in contrast to single-piece keyboards.
I continue to work on the “floating hands” approach, particularly concerning how it impacts my posture. I feel that it causes me to sit up straighter, which has a positive impact on how my back feels. However, I have neck/shoulder discomfort on occasion; therefore, I need to continue exploring better ways to position myself and my equipment.
Overall, the keyboard change has been an improvement to how I feel and I believe will continue offering improvements over time as I take further steps to optimize my working environment.
Potential Next Steps: Wireless and Chair Mounting
My keyboard is (currently?) wired as Wylderbuilds wasn’t able to provide a wireless one. And that’s okay – I’m content with wires, at least for now. It works great and is a definite improvement so I can’t complain.
At some point, I’ll receive the wireless upgrade kit from Wylderbuilds; until then, I’ll enjoy the keyboard as it is. I am a bit concerned about how involved a wireless conversion will be as many changes are necessary, some of which will be quite involved. The microcontrollers will need to be switched out for ones that support Bluetooth. Batteries will need to be added. The trackball motion sensor should be switched from a PMW3360 to a PMW3610 to save power. The OLED screens should be changed to more power efficient ones (such as nice!views) but there’s the issue of finding replacements that exactly match the dimensions of the existing ones.
When it is wireless, I have some interesting ideas I’d like to explore, such as mounting the keyboard halves to the arms of my chair. But that will have to wait for another day.
![]() 3 month review of custom Dactyl Manuform Keyboard with Trackball by Craig Andrews is licensed under a Creative Commons Attribution-ShareAlike 4.0 International License.
3 month review of custom Dactyl Manuform Keyboard with Trackball by Craig Andrews is licensed under a Creative Commons Attribution-ShareAlike 4.0 International License.
I’m enamored with the idea of a split keyboard that has an integrated trackball, but there is one reason why I’m not close to pulling the trigger on buying one: no manufacturer is making any, they’re all kits (some that you can buy prebuilt).
It’s not an issue of me questioning the quality of a 3D printed kit, although I guess that, if pressed, I might have a slight concern with that. Rather, it’s that a lot of ergonomic keyboard manufacturers have spent a decade or more continually experimenting and releasing new models of split keyboards, and none of them have arrived at a model using an integrated trackball.
Integrating a pointing device of some sort (trackball or trackpad, presumably, although I did see one split keyboard where both halves of the keyboard are themselves the mouse– you literally slide the keyboard around the desk) is a super obvious idea, I must believe that these companies have researched and experimented with it over the years. The fact that I can’t order something like this from any of them strongly implies to me that, in practice, they don’t work as well as they seem like they would in theory.
I’m curious if you have any thoughts on this topic, like some reason other than the design just not really working that well for why no one is making keyboards like this. Also, I wonder if you gave any thought to getting a trackpad, rather than a trackball– I have limited experience with both?
It is basic economics. Split curved ergo keyboards are a niche market, and the only long time major keyboard manufacturer in that space is kinesis. The niche of that product style, and the boom of mechanical keyboard culture has raised demand for split keyboards more, and the glove80 is really the first major competitor to kinesis in split ergo curved boards. They also just cost a lot to design and manufacture, and adding a trackball and sensor adds an additional level of cost and complexity.
If the demand for trackball split ergo curved keyboards outgrows the capacity of opensource/single individuals making 3d printed versions, then you may in the future see a startup come in like moergo did with the glove80, but tooling on injection molded parts is expensive. It isn’t that kinesis was unable to make a good implementation of the advantage 360 with a trackball integrated, its that companies that size are not likely to spend tens of thousands on development and tooling costs if the demand does not more than offset that cost.
How do you rightclick/leftclick/scroll? And how well does that work?
The click buttons on my left thumb cluster on the top row. Left click is on the left, middle in the middle, and right click is on the right.
If I hold the left thumb cluster lower row left button, that puts the trackball into scroll mode. The right rotary encoder also scrolls.
I really like how this setup works. I initially tried to set it up like a mouse would be with the click buttons and the trackball on the same side, but I quickly came to realize that my hand always moves a bit while pushing a button meaning that clicks would cause the cursor to move, making precision operations impossible. So I put the click buttons on the opposite hand as the trackball and that works great.
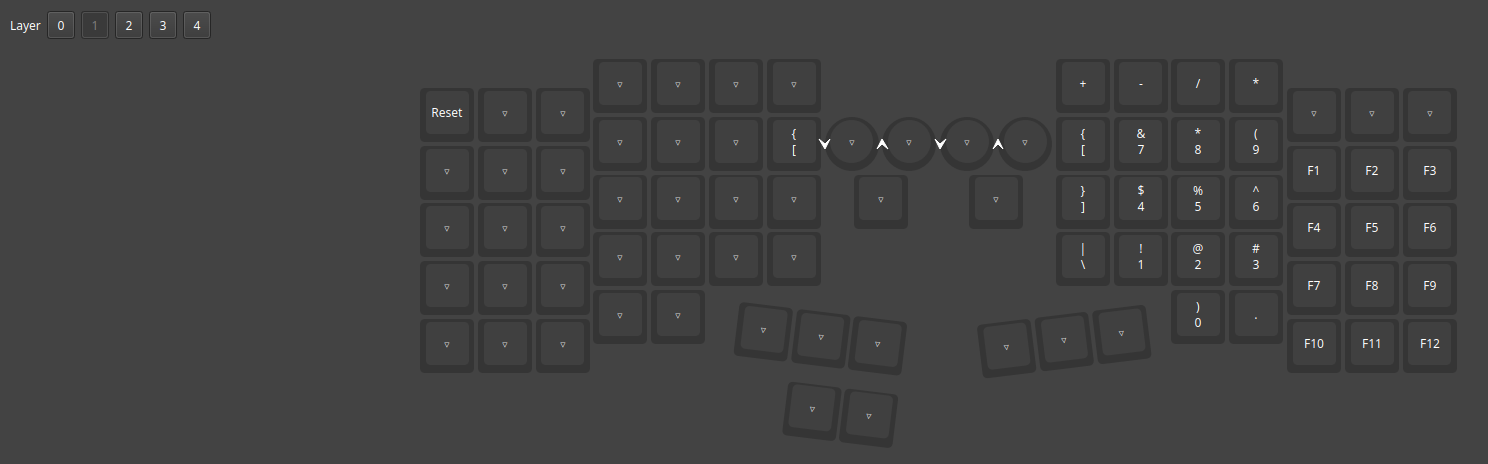
Where is your space key? I don’t see it anywhere on layer 0. I was expecting the right three to be delete, space, enter.
Lots of good information about your choices and what you might change. I found it incredibly informative for my own Wylderbuilds order.
Space is the left thumb cluster lower left key. It’s TD(2) in the key layout, so if I hold it down, layer 2 is activated.
Thank you for the kind words, I’m glad to be helpful. I hope you enjoy your new keyboard!