I previously decided upon a custom Dactyl Manuform with Thumb Cluster Trackball as my next keyboard. Because it’s a custom keyboard, there are a lot of decisions to make: which builder to order from, size, RGB, wired / wireless, thumb cluster configurations, encoders (how many and where to place them), and material (resin or PLA).
Update: I received the keyboard and have been using it. Here’s my 3 month review.
Selecting a Builder
I found a few providers of custom-built Dactyl Manuform keyboards, including Cyboard (which now offers integrated trackballs but did not when I was evaluating vendors), Bastard Keyboards (which does offer the Charybdis, but doesn’t offer wireless or larger sizes), Skree.us, TaikoHub, and Cheap Dactyl. However, I only found one provider that offered an integrated trackball at the time of my evaluation: Wylderbuilds.
Diving into Wylderbuilds, I found they have great reviews, their customer service is top-notch (they’ve been incredibly responsive to my many emails), and they’re very active on Reddit’s/r/ergomechkeyboards. They even offer custom sizing based on my specific hand measurements! Wylderbuilds is also a US-based company, eliminating concerns regarding overseas shipping or currency exchange.
Size
These keyboards are available in sizes from 3×5 (~40 keys total) to 6×7 (100+ keys total). Within each size, there are options for standard (missing bottom keys on the pinky column), bottom full rows (adding those pinky keys back in), and full matrix (which moves the thumb cluster down and adds the keys previously displaced by the thumb cluster back in).
“Standard” looks great and seems ergonomic to me.
“Bottom full rows” appears to be even better, since it has a couple of extra keys without impacting ergonomics. In my reasoning, the worst-case scenario is that there are a couple of extra keys that I don’t use.
“Full matrix” seems less ergonomic, changing the angle of the matrix relative to the thumb cluster, and it generally does not look very comfortable. I suppose if the goal is to replace a standard 104-key keyboard with a Dactyl Manuform, then a 6×7 Full Matrix would be a good choice. But that is not what I’m looking for.
Therefore, I decided on the “bottom full rows” design.
My concern about making too many changes all at once was the primary motivator for my decision regarding the size. I’ve used an 88-key Microsoft Sculpt keyboard for a long time; going to a layout that requires a large learning curve due to requiring extensive use of layers to access common keys would be a huge change. I didn’t want to jump right to a small 3×5. But, a large 6×7 just doesn’t seem like a big enough change, not offering as much of an ergonomic advantage as I wanted. For a happy medium, I settled on the 5×7 size. This larger size is certainly not as “trendy” (3×5 is all the rage at the moment), but it seems like a good choice for a newcomer to “exotic” keyboards.
Finally, the outer column can be normal (1u) or larger (1.5u) keys. I chose the 1.5u as it seems like it would be easier for the weak, less coordinated pinky finger to press.
Custom Sizing
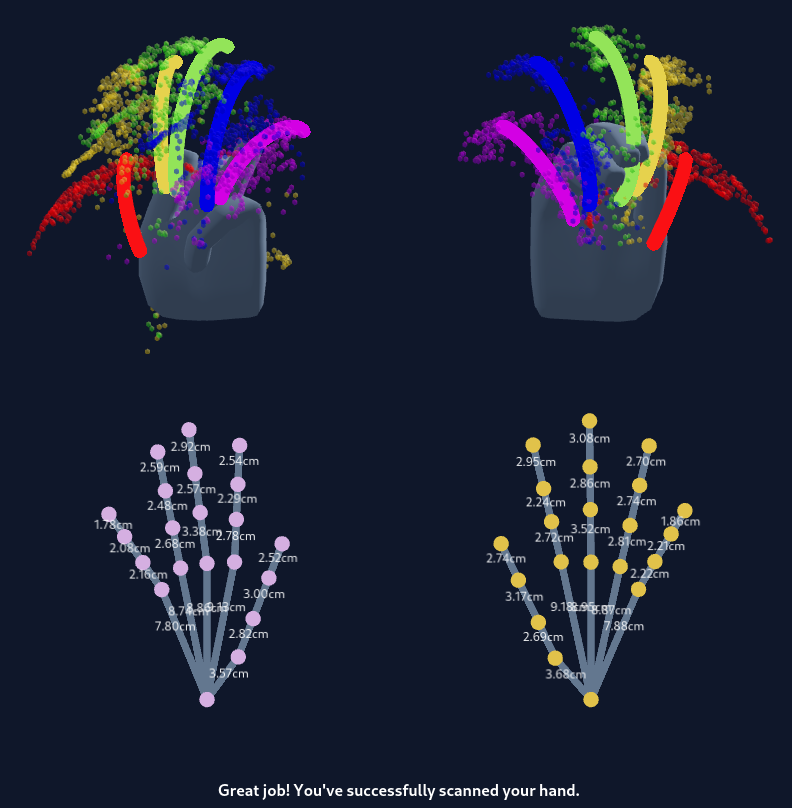
Wylderbuilds can further adjust the keyboard’ stagger and key wells based on your specific hand measurements. I used Cosmos Hand Scanning to get my hand size information and provide it to Wylderbuilds, which they then used to personalize my keyboard.
RGB
This choice was easy: I don’t like blinking lights so I didn’t get any.
Wylderbuilds offers under glow RGB, but I opted out. They don’t currently offer per-key RGB, which made no difference to me, as I don’t want it anyway.
Wired / Wireless
I use a KVM so no matter what, I’ll be using a wired interface the vast majority of the time.
But having a wireless connection between the two halves of the keyboard sounds nice. So at least one side could be completely wireless, with the other side having a USB connection to the computer (or KVM, in my case).
Another advantage of the wireless interface is that there’s no need to worry about the wire going between the two halves shorting something out, as can happen when TRRS is used to connect the halves.
And wireless opens new use cases such as connecting to my phone. Wireless would also make it easier to do exotic things such as mounting the keyboard to a chair.
My keyboard order therefore includes the wireless option.
Thumb Cluster Configuration
Selecting the thumb cluster configurations was a huge point of analysis paralysis for me. I once again consulted the Internet by posting to Reddit: Deciding Encoder Position and Thumb Cluster Design. Wylderbuilds even responded to my plea for help.
On the left, I chose the “Mini 5-key Thumb Cluster” option. After reviewing the thoughts of many people (in Reddit comments, YouTube videos, personal sites, and more), I came to the conclusion that the oldest, most common design, “Default 6-key Thumb Cluster,” was too cramped. Hence, it was unlikely I could comfortably reach and use all of the keys, probably even accidentally pushing the wrong keys resulting in a really poor experience. The “Carbonfet 6-key Thumb Cluster” is a response to the faults of the default thumb cluster. The very well-reviewed glove80 has a thumb cluster with a very similar design to the Carbonfet one. I think this option is solid, and it was my second choice. But I ultimately didn’t choose it as I just don’t think 6 buttons are necessary. The “Arc 4-key Thumb Cluster” had me wondering whether my thumb could stretch to comfortably reach 4 keys in a line; being unsure, I passed on that option. Finally, the 3 key options looked nice, but I feel like that’s not a lot of keys; I believe my thumb is capable of more than that. So coming full circle, the “Mini 5-key Thumb Cluster” seems like a happy medium.
On the right, I decided to go with the “Wyld 3-key Trackball Cluster.” I chose this design because it looked ergonomic (passing my fundamental sanity check), had only 3 buttons (I thought that more than 3 buttons with a trackball just seemed too cramped), and was spoken highly of by Wylderbuilds (who has much more experience than I do in this area). The “4-key Trackball Cluster” design is more popular than this one, but I suspect that has more to do with it being a much older design than anything else.
OLED Displays
Little OLED displays are fun, and they don’t impact ergonomics. So there’s no downside… worst case is that I never look at them, but the best case is that I find some fun use for them. My keyboard will therefore have two OLED displays, one in each half’s inner wall.
Rotary Encoders
Rotary encoders are dials/knobs that be used for a variety of purposes, such as scrolling, zooming, and adjusting volume. Encoders can be placed in the inner wall of the keyboard or in place of any key.
I see no reason not to put an encoder in the inner wall. There’s nothing in the inner wall anyway, so using the space seems like a good idea. So I put an encoder on each inner wall.
After much deliberation, and consulting with the Internet (Deciding Encoder Position and Thumb Cluster Design), I decided not to replace any keys with encoders. As one reply pointed out, I could use a key to toggle the trackball to enter drag scroll mode, then I don’t need an encoder, and I get to keep a precious key.
Material
The two material options are PLA and resin. PLA is filament-extruded plastic that’s commonly used by 3D printers, whereas resin is printed by incrementally placing tiny drops of liquid and then curing them with ultraviolet light.
Resin gives a nicer finish, superior to filament-printed PLA, but it costs more. I splurged for the resin.
My Order and Cost
My exact order is:
- 5×7 Dactyl Manuform keyboard build with hot-swap support ($480)
- Full bottom rows
- KMK firmware
- A 3D-printed case in solid black resin ($50 option)
- Bottom plates printed in a near-matching color PLA
- Bluetooth Wireless Support ($100 option)
- 2 Rotary Encoders, one in each side’s inner wall ($10 per encoder)
- Wyld 3-key trackball thumb cluster on the right side
- Mini 5-key thumb cluster on the left side
- OLED Screens on both sides ($9 per screen)
- Wide 1.5u pinky columns
- A black trackball
- Pair of wrist rests ($15)
My receipt shows the total coming to $584. A smaller size, or dropping some of the options, would have reduced the cost (dropping wireless would have saved $100 alone!). In the end, I’m quite happy with these features and this price – it seems reasonable for something that’s both a practical, work-oriented ergonomic device and also a little hobby fun.
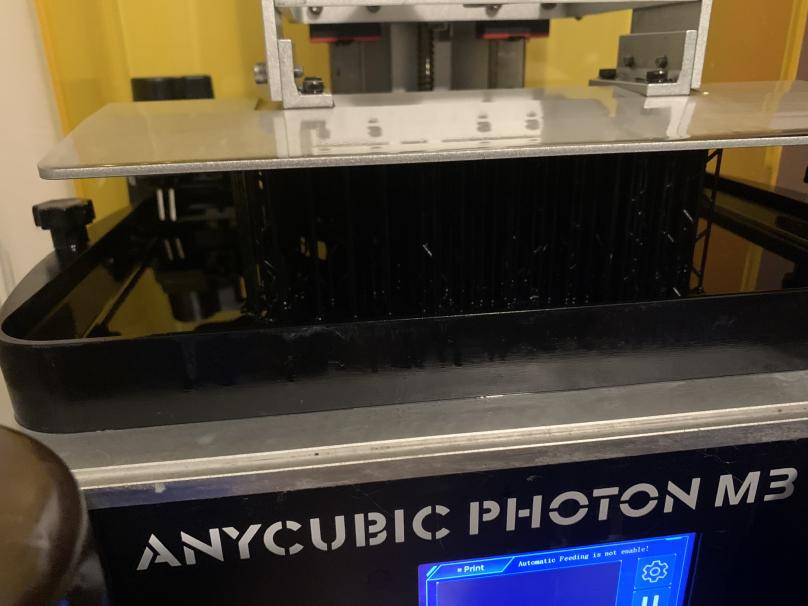
Build In Progress
Wylderbuilds sent me a picture of the resin print in progress:
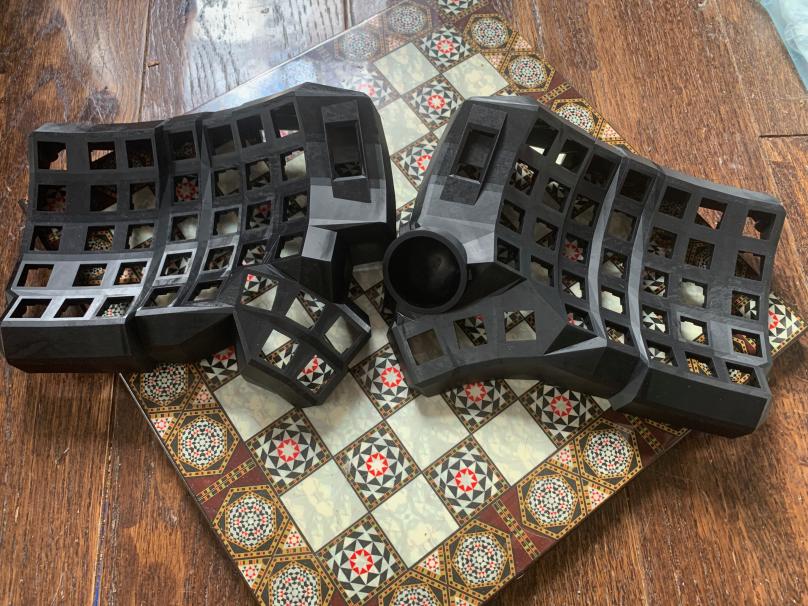
The printed keyboard:
Next Steps
I have a few decisions to make before the keyboard will be usable:
- Key switches
- Linear, tactile, or clicky?
- Red, blue, navy, jade, silver, panda?
- Keycaps: SA, MT3, DSA, OEM, Cherry, XDA?
- Keymap/layout:
- qwerty, colemak, dvorak
- miryoku, ErgoDox EZ, Glove80
But those are topics for another time.
![]() Ordering a Custom Built Dactyl Manuform Keyboard by Craig Andrews is licensed under a Creative Commons Attribution-ShareAlike 4.0 International License.
Ordering a Custom Built Dactyl Manuform Keyboard by Craig Andrews is licensed under a Creative Commons Attribution-ShareAlike 4.0 International License.