Over the past few weeks, I slowly worked on my first significant electronics project: building an ergonomic mechanical keyboard, the Bastard Keyboards Charybdis. I even spiced things up by making the keyboard hot-swappable, a feature not offered by the authoritative design. I was initially intimidated, given my lack of experience in this type of work; even the name Charybdis, shared by the legendary Greek sea monster, is foreboding. But like Jason and the Argonauts of Greek lore, I, too, successfully navigated Charybdis’s challenges and thus feel more heroic. I heartily encourage anyone considering such a project to do so.
What follows are my thoughts on building and setting up the keyboard including the challenges I encountered and how I overcame them, including the challenge I invented for myself with the hot swap capability. A review of using the keyboard will come later in a follow-up article.
- Disclaimer
- Initial Thoughts on the Charybdis
- Pre-Assembly Shopping for Supplies
- Choosing the Charybdis over the Charybdis Nano
- Receiving the Charybdis Kit
- Assembling the Charybdis Kit
- Making the Charybdis Hot Swappable
- Testing, Troubleshooting, and Fixing
- The Fully Assembled, Fully Functional Keyboard
- Charybdis vs My Wylderbuilds Dactyl Manuform
- Final Thoughts
Disclaimer
Bastard Keyboard reached out and offered to send me a Charybdis or Charybdis Nano DIY kit for free on the condition that I provide an unbiased and honest review. And that's precisely what this first article and subsequent follow-up articles will do. Bastard Keyboards did not receive a copy of this article before publication and was not involved in its editorial process in any way. All opinions expressed are my own.
Initial Thoughts on the Charybdis
I learned about the Charybdis when I looked at some of the most popular ergonomic, mechanical keyboards:
One unique characteristic of this keyboard is that the trackball is positioned under the palm, as opposed to by the fingers or by the thumb. I’m not sure if this design is better, but it is definitely unique – I wish I could try one.
This keyboard is fantastic, but, I think I might want more keys. I’m currently using an 88 key keyboard, and this keyboard has only 56.
At the time, I thought the Charybdis was appealing and almost selected it then. I’m eager to give it a thorough review now. But first, I had to decide which Charybdis to try.
Pre-Assembly Shopping for Supplies
This was my first significant electronics project; before this effort, I didn’t even own a soldering iron. With the Charybdis required tools list for inspiration, I went shopping:
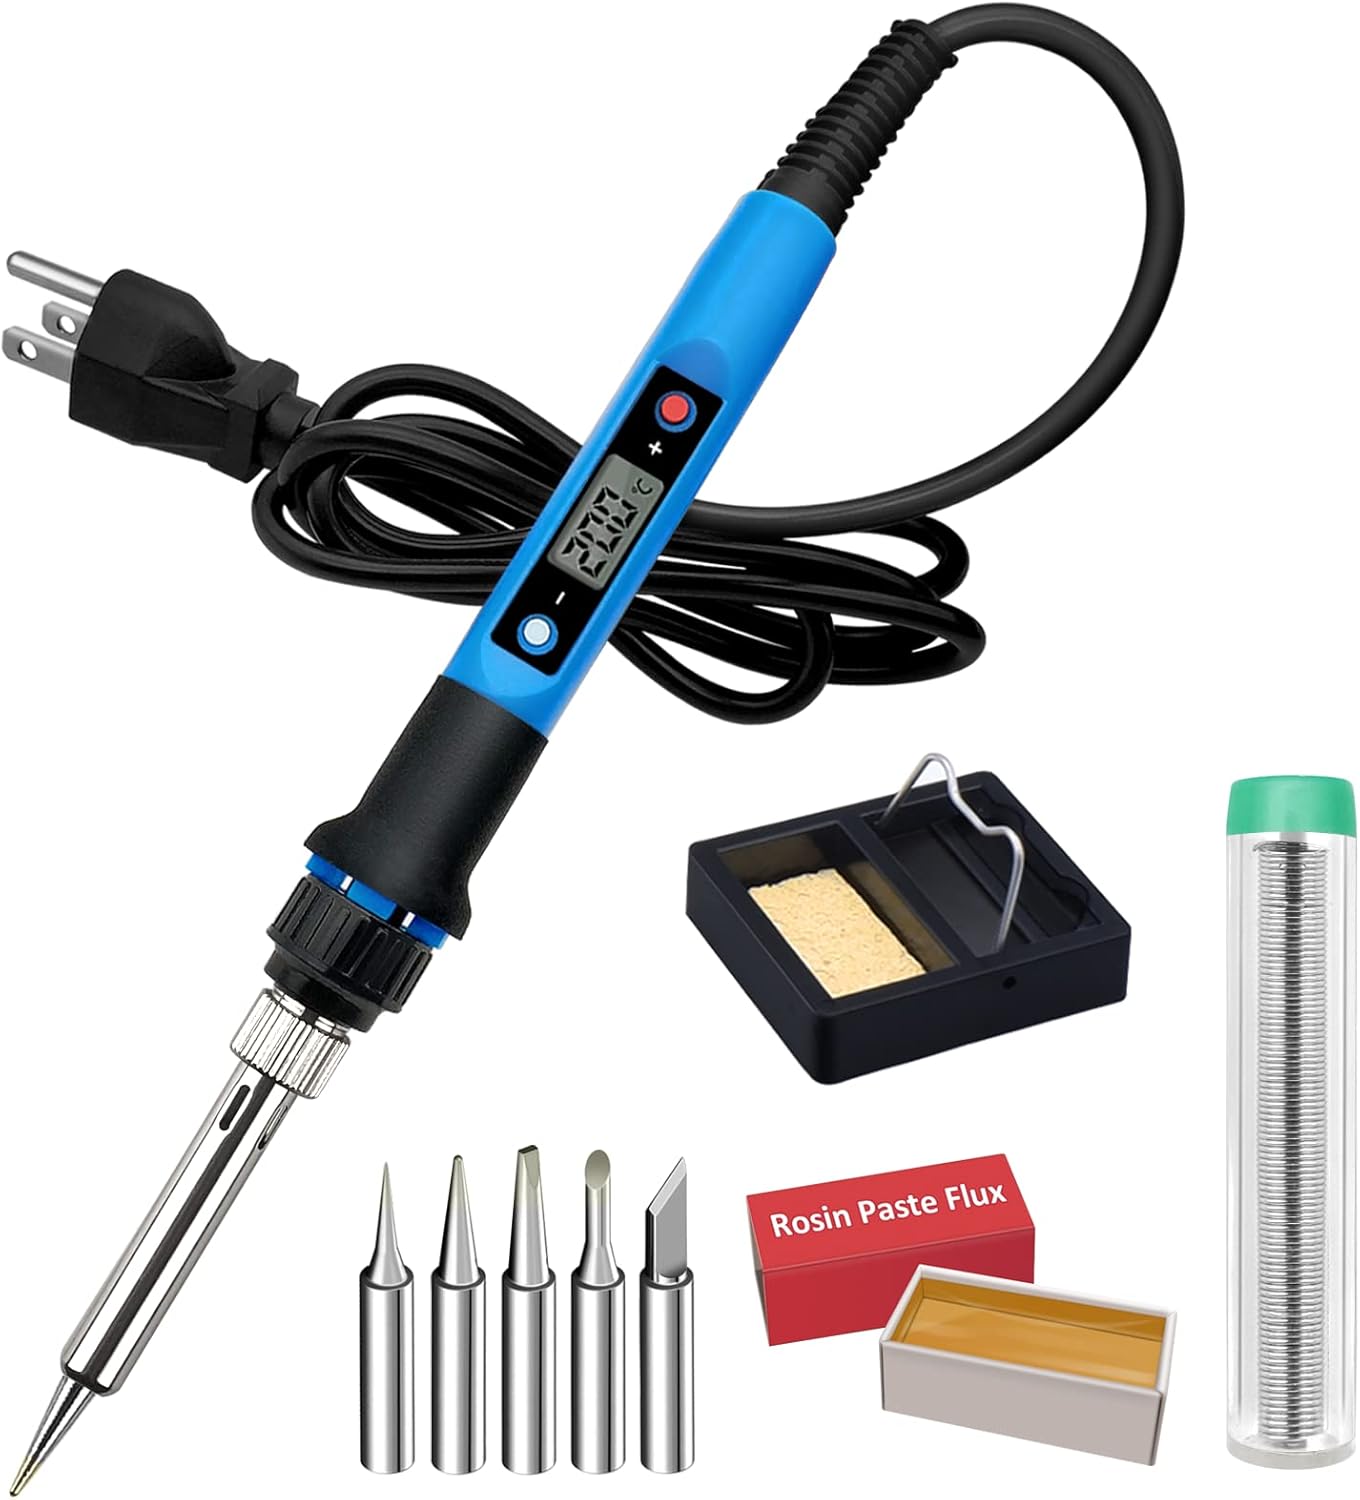
$10 soldering iron (including solder!). This inexpensive tool got quite a workaround in this project. I never had a problem with it and I recommend it.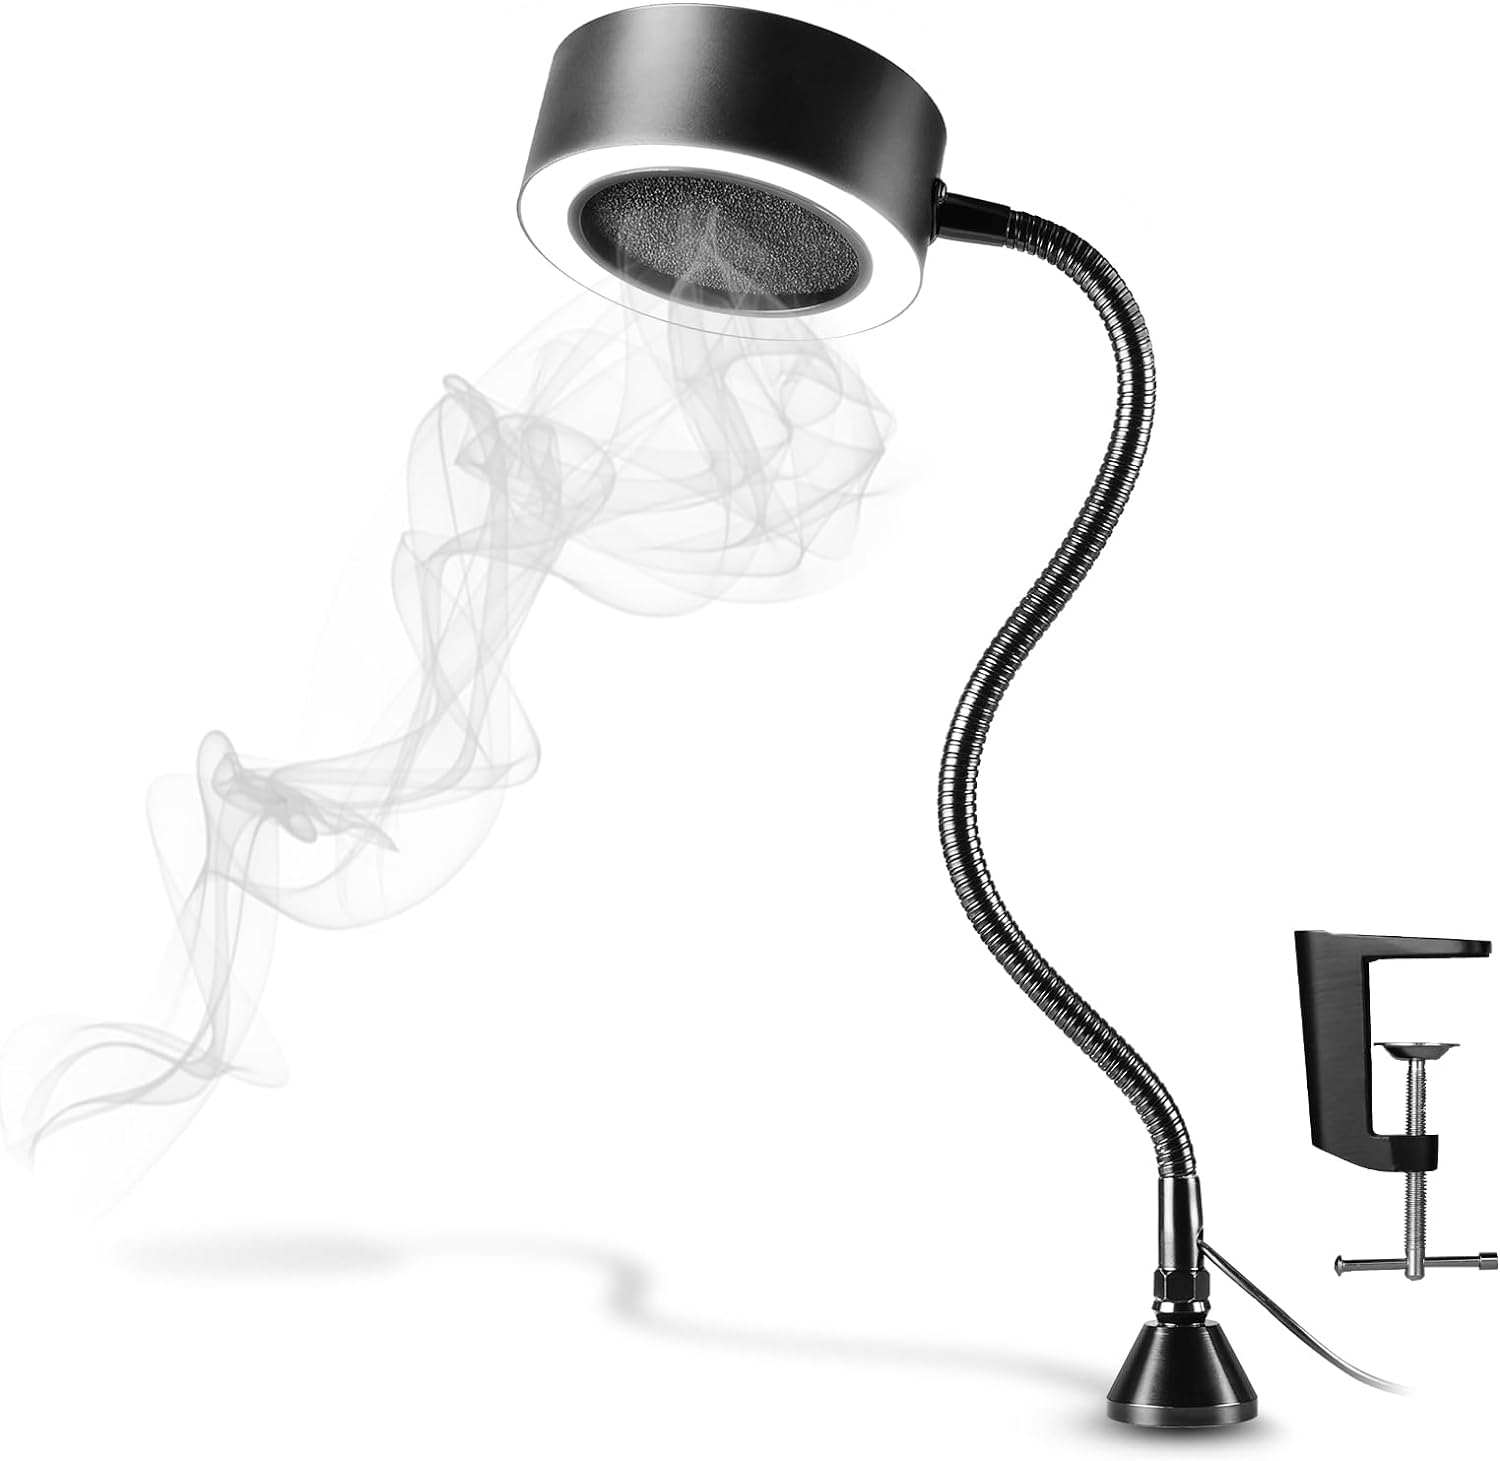
$45 fume extractor fan with light. I didn’t really want to inhale solder, flux, and melted plastic fumes so I considered this fan to be a necessity. Plus, the light was very useful for those little tiny solder jobs.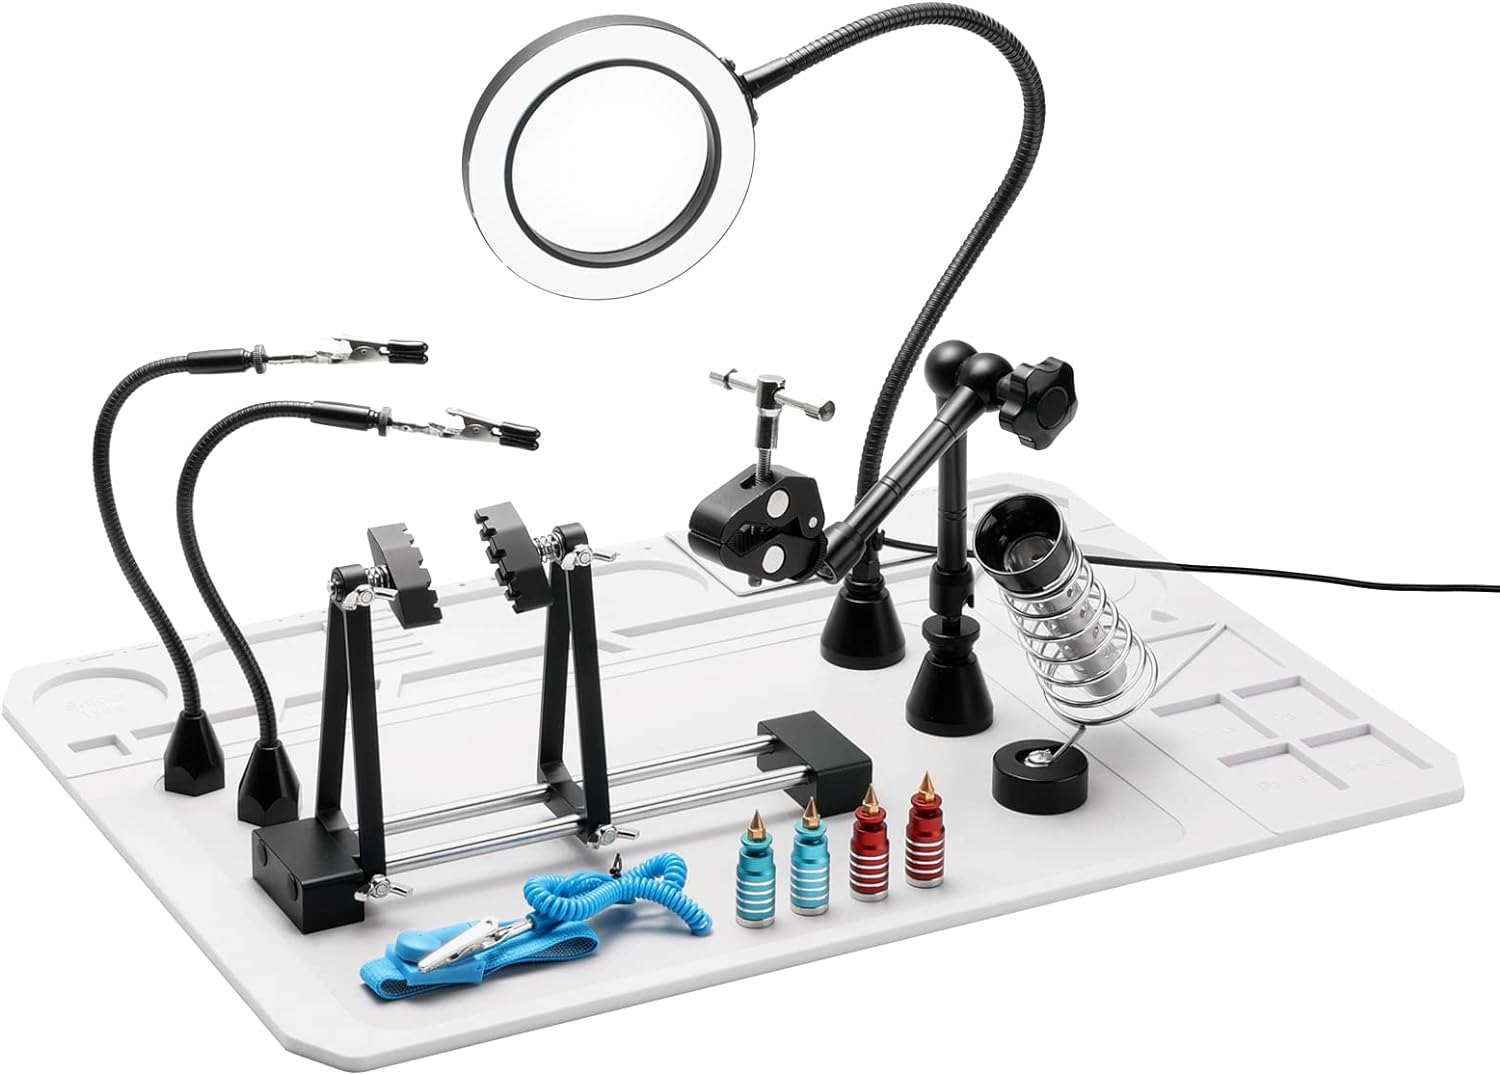
$100 soldering station with magnifying lamp, helping hands, and solder iron holder. The magnifying lamp was a must-have for the small, surface mount device (SMD) soldering tasks, and the soldering iron holder saved me from burning myself many times.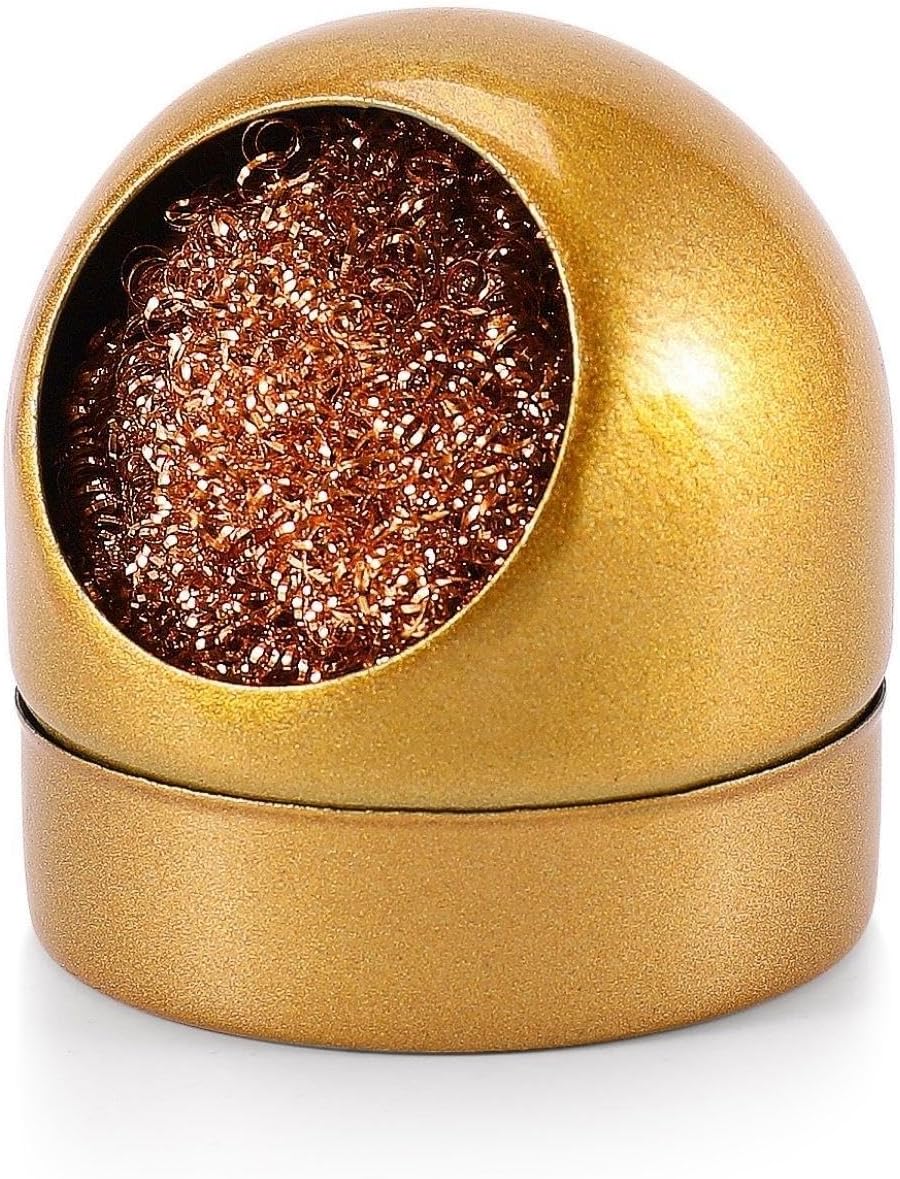
$7 brass sponge. The $10 soldering iron includes a wet / water sponge, but I found it didn’t do a good job cleaning the soldering iron tip and was troublesome to keep hydrated. This brass sponge does a great job, is easy to use, and always ready to go.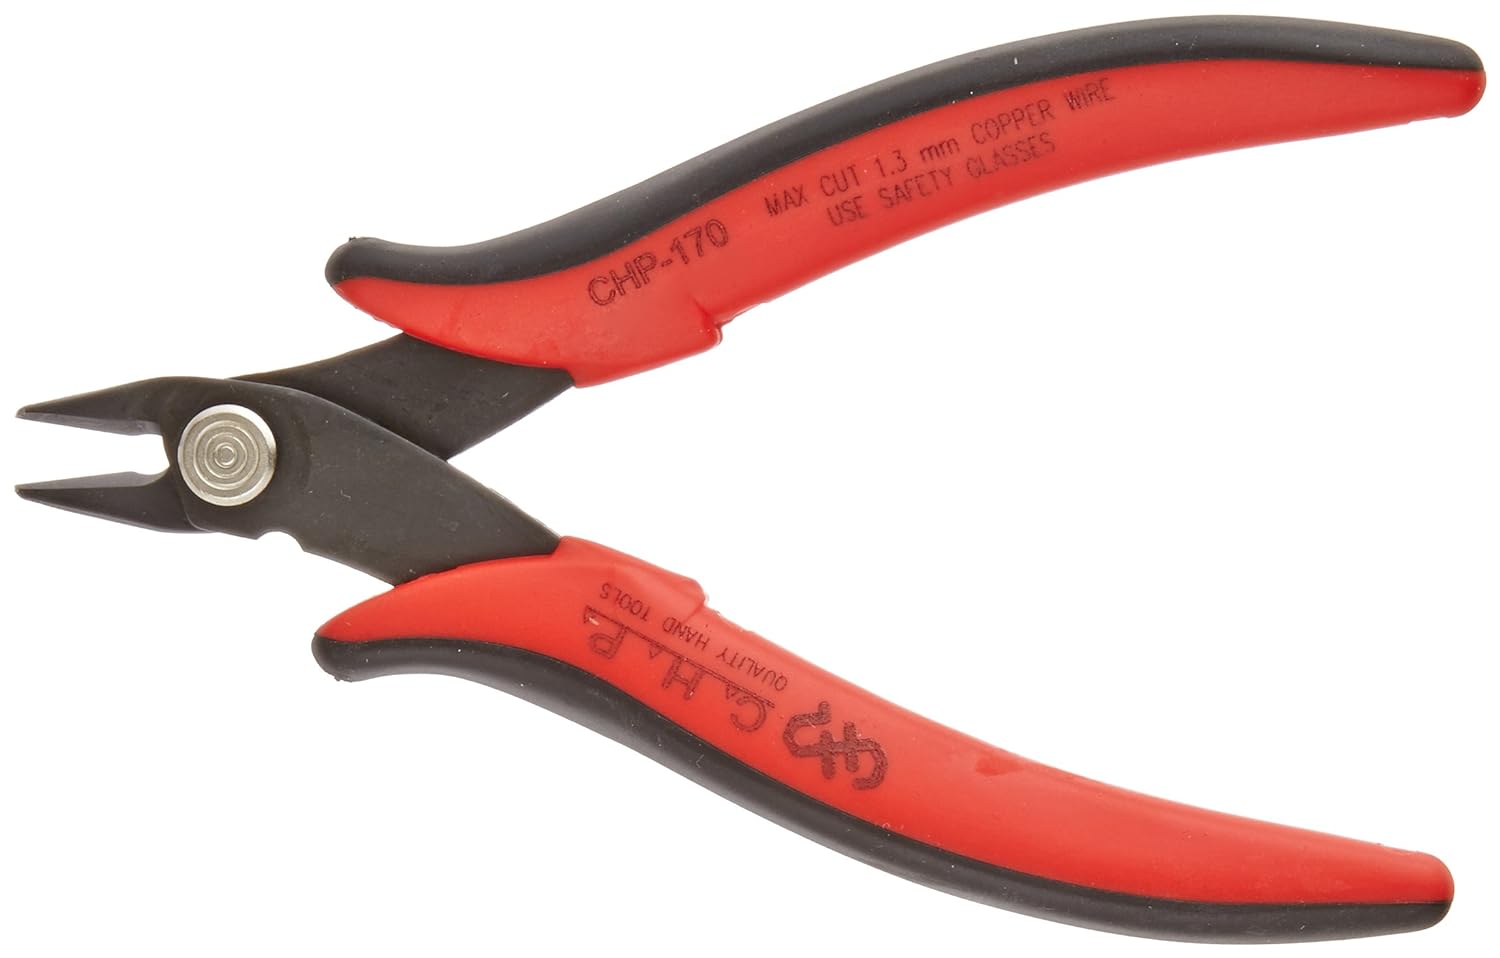
$6 flush cutters. It’s important to trim excess wires and pins.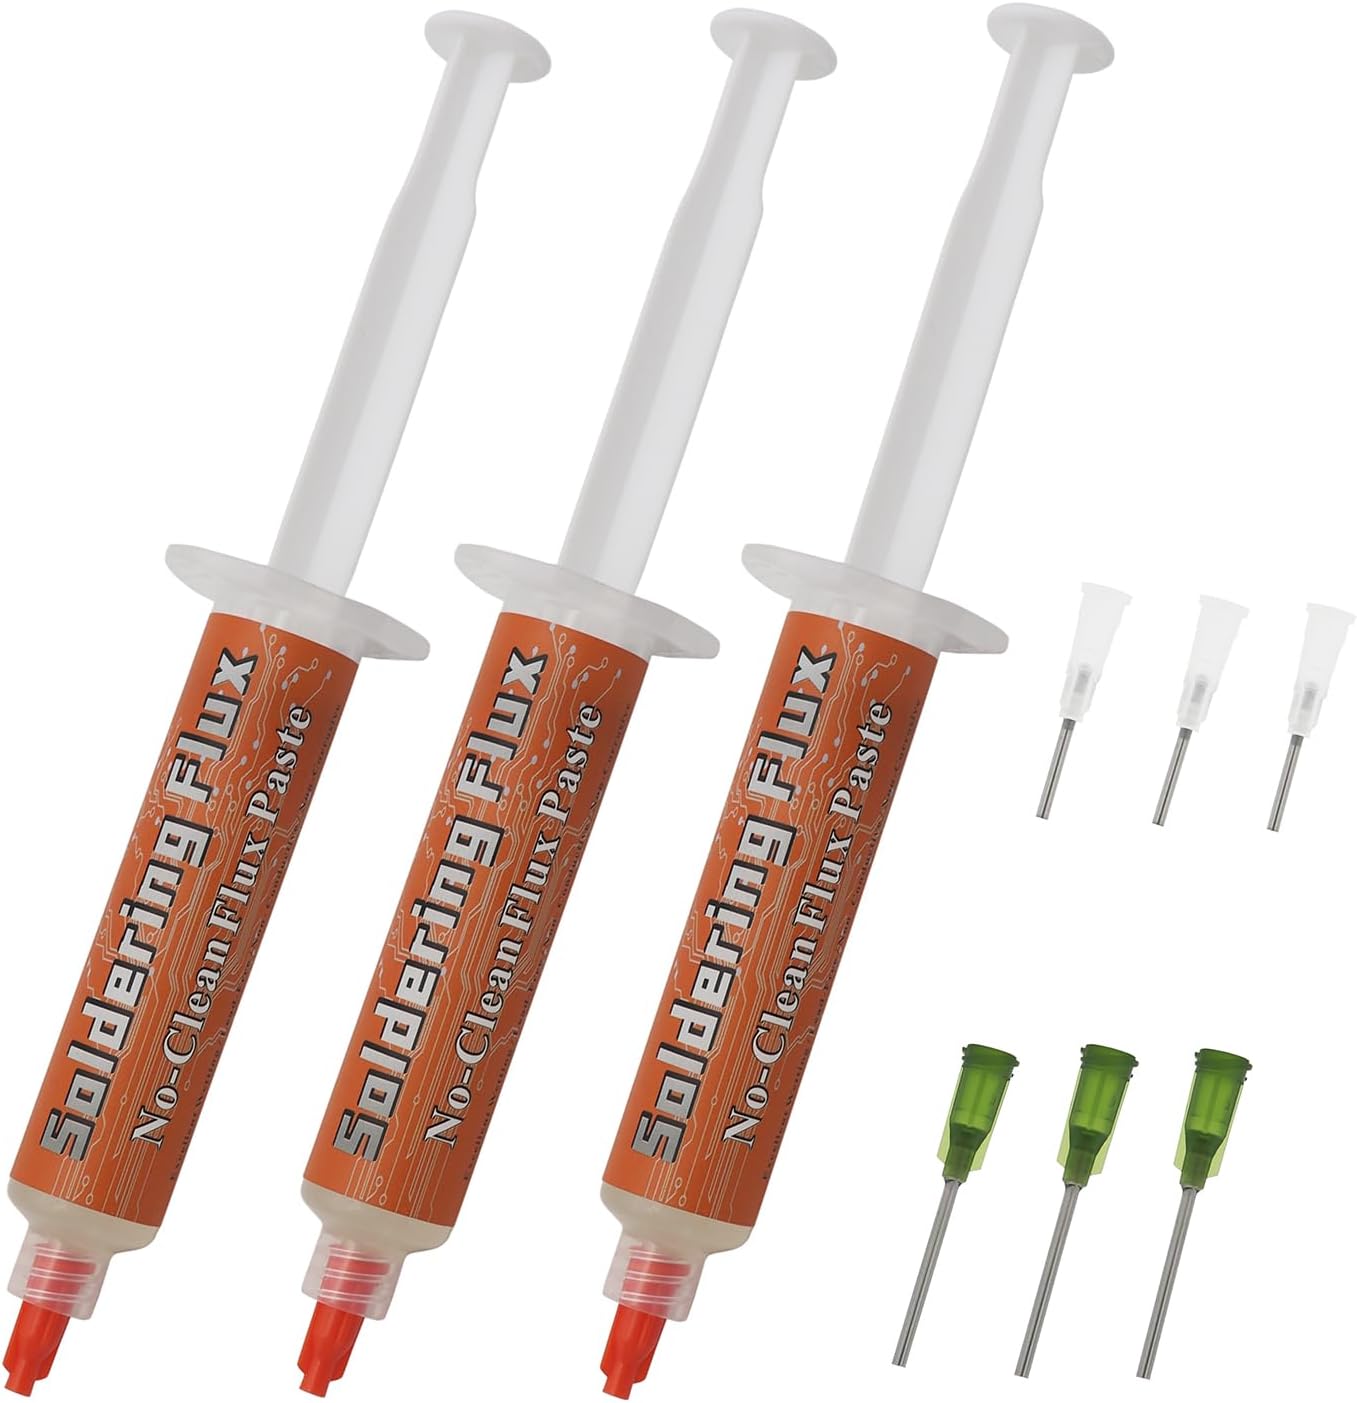
$10 No clean solder flux.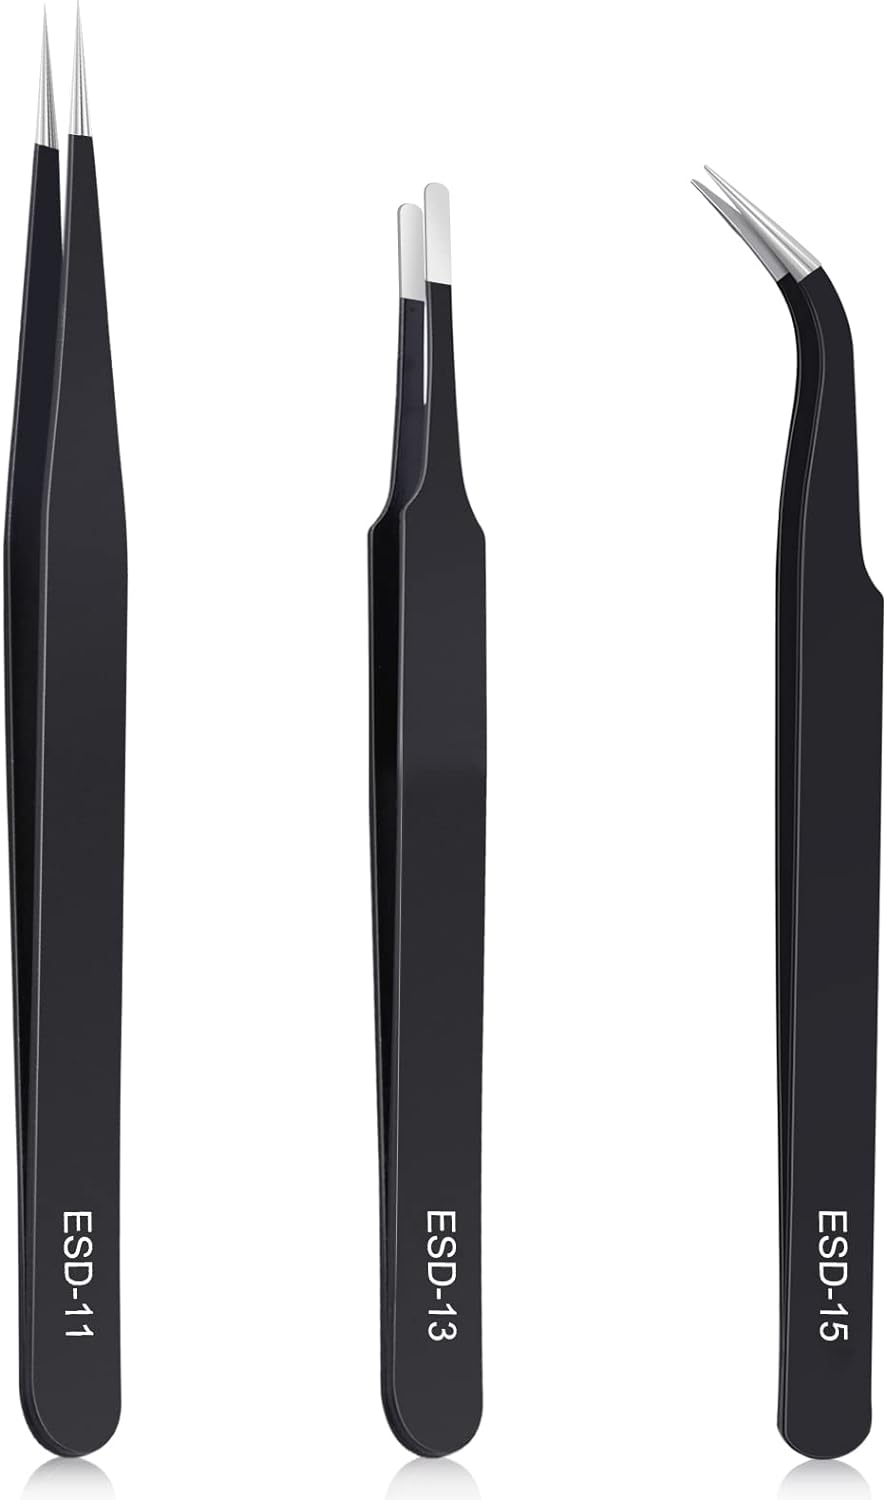
$6 tweezers. These tools are necessary to hold little SMD components in place while soldering them.
I spent $174 on the tools and supplies that I deemed necessary. You may not need all these supplies; for instance, perhaps you have better eyesight than me and can do without the magnifying lamp. The important takeaway is to get the supplies you need to ensure success. And that all of these supplies are usable for future projects.

Choosing the Charybdis over the Charybdis Nano
The Charybdis has 56 keys while the Charybdis Nano has 35 – a significant difference. While I have grown accustomed to home row mods and layers, I still routinely use around 50 keys. Transitioning from a 72-key 5×7 Dactyl Manuform to a 56-key 4×6 seems daunting enough – going to a 35-key 3×5 is a step too far (at least for now). I’m not convinced that losing those keys is worth the purported ergonomic benefits.
Therefore, I ordered the Charybdis kit.
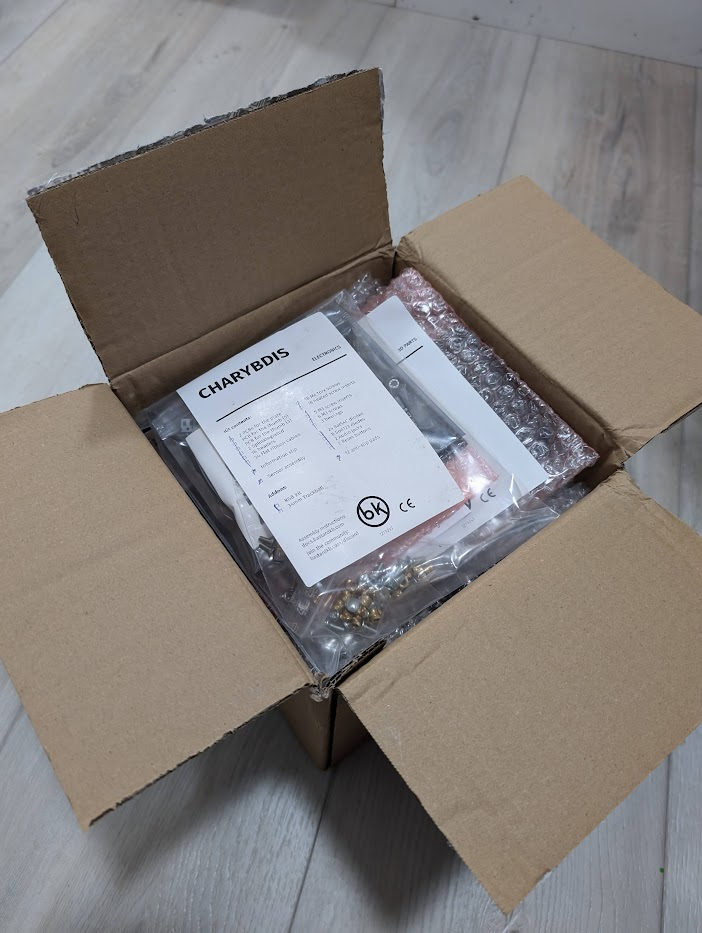
Receiving the Charybdis Kit
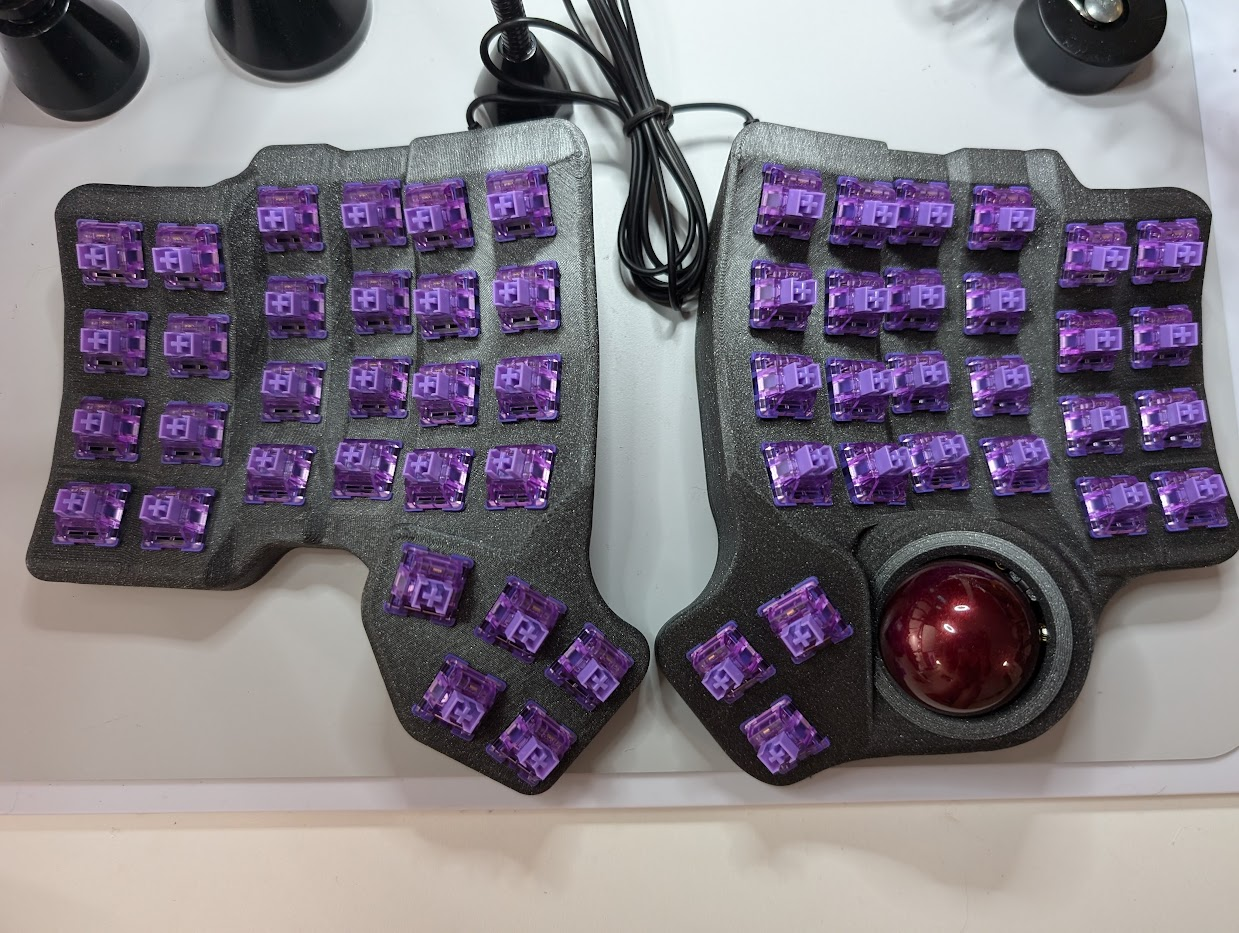
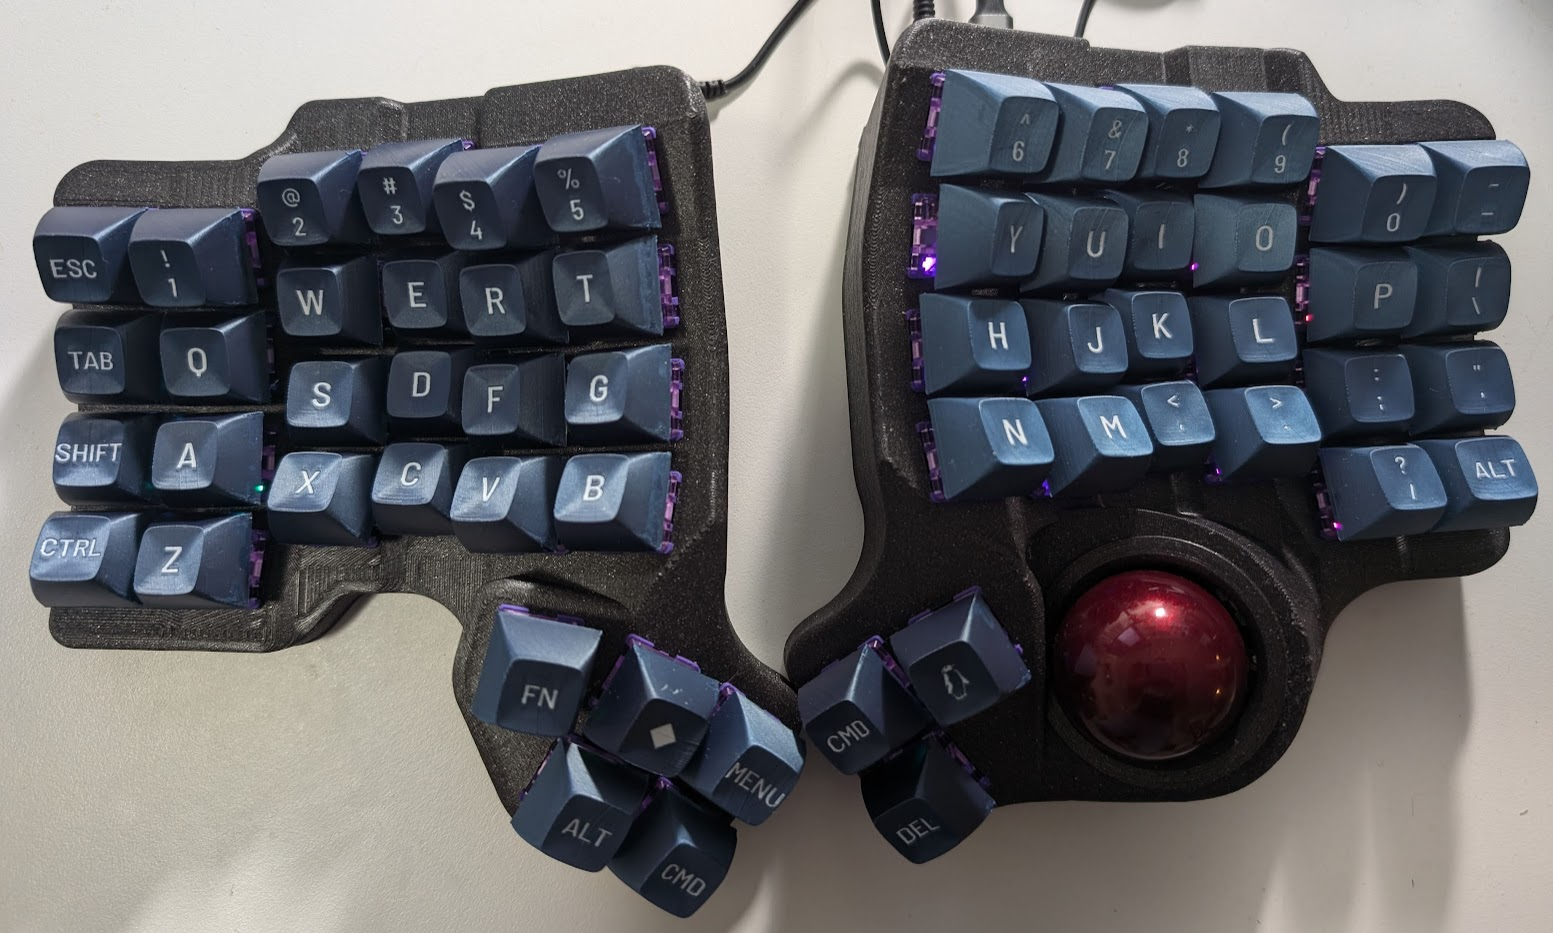
My order included the Trackball (right side), per-key RGB, and 3d printed case. I have a 3d printer but in the interest of providing a complete review, I used the 3d printed case and parts provided by Bastard Keyboards.
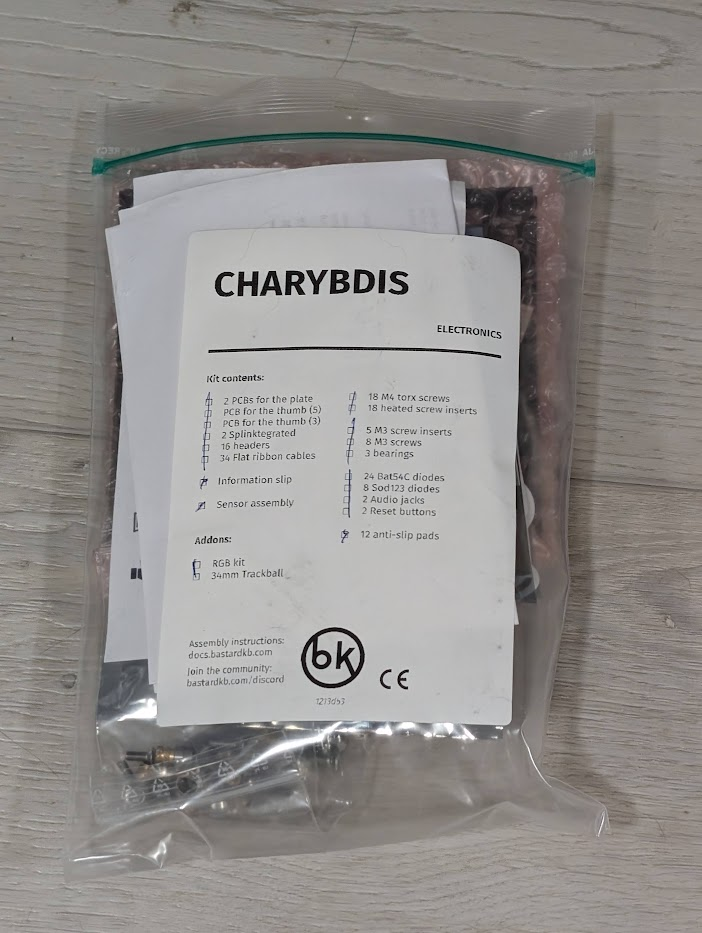
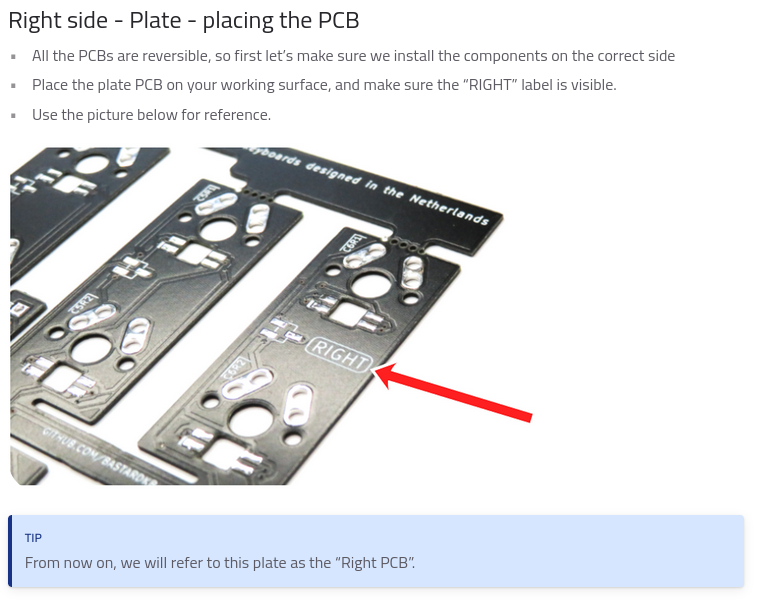
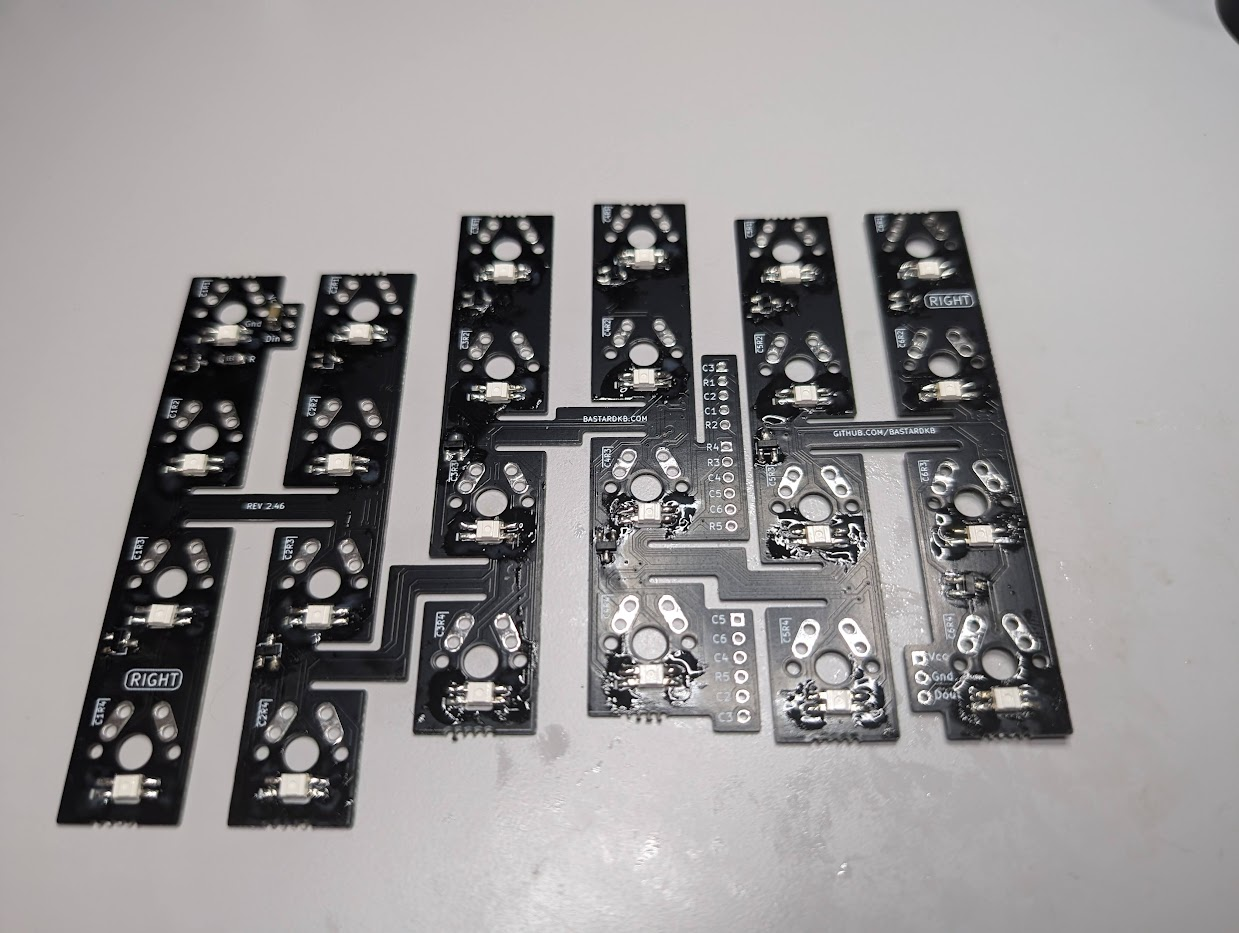
Assembling the Charybdis Kit
The instructions provided by Bastard Keyboards are well done and easy to follow. The text is well written and the many pictures are invaluable. There’s also the 45-minute long, well-detailed Bastardkb – Charybdis build guide video on YouTube that I found to be a helpful reference. Even with this documentation, which is excellent, I still had to spend a lot of time and effort carefully examining each instruction, staring at the parts, and double-checking that I knew exactly what to do before taking any action. I recommend that kit builders read the build instructions, watch the video, and only then start building the kit, continuously referencing the text and instructions as assembly progresses.
As a professional software engineer, I’m accustomed to practices such as Test Driven Development, Move Fast and Break Things, and a Bias to Action – but none of those are good ideas in the hardware world: there is no ctrl-z, no git revert, no “undo” in the real world.
The one time I made a mistake, I soldered a reset button to the wrong side of the Splinktegrated board and had to remove it. It took me two minutes to solder the reset button, and probably 2 hours to remove it between figuring out what I needed (I had to order desoldering braid), figuring out how to desolder by watching YouTube videos and reading articles, and then actually doing it. In the process, I destroyed the reset button. At that point, I was truly thankful that the kit included at least one extra of each of the SMD components.
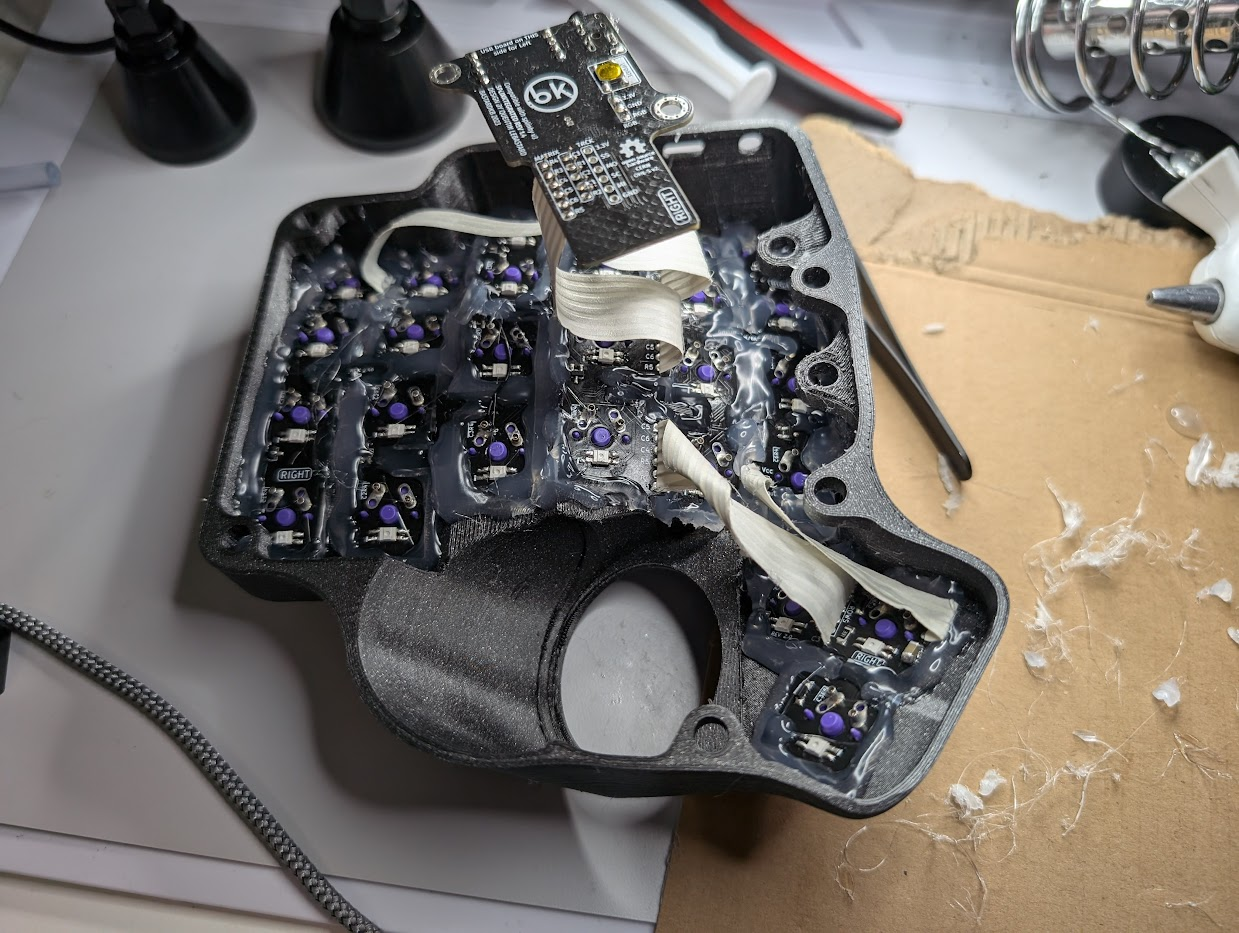
Making the Charybdis Hot Swappable
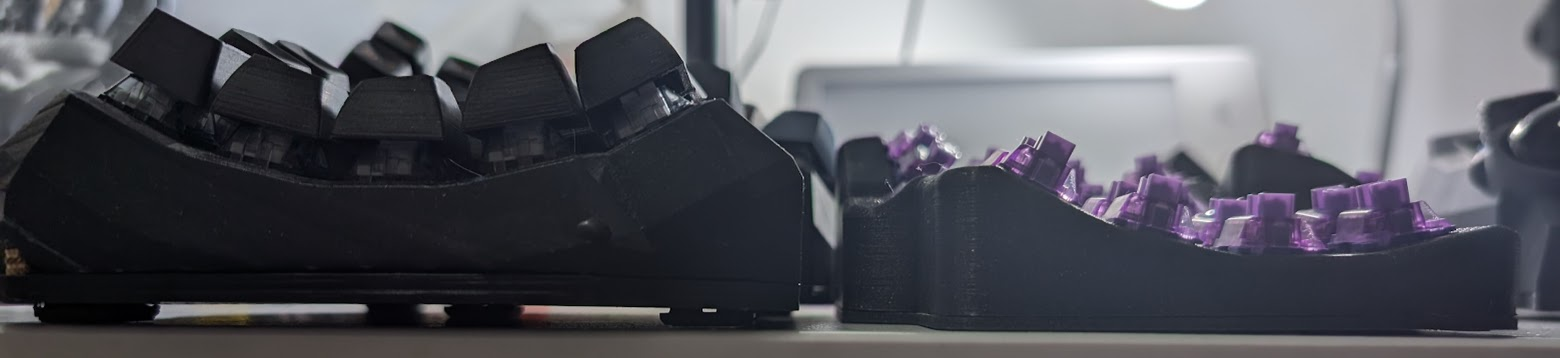
I have no experience doing this kind of project, so it’s only natural that I decided to make the project more difficult, and I did so by making the Charybdis hot-swappable. I can be a bit indecisive, let’s say I’m a fan of the “Decide as Late as Possible” principle of Lean Software Development, and hot-swappable switches allow me to defer this decision and change my mind whenever I’d like. I’m using Akko V3 Lavender Purple Pro Keyboard Switches because I wanted to try tactile switches (my Wylderbuilds Dactyl has clicky switches). I used Rousslan Dossa’s Charybdis Build Log as inspiration for my approach.
Some people have done millmax builds by gluing the PCBs, others have done it by using amoeba single switch PCBs and no glue (although this is basically like hand wiring with extra steps). The global experience with gluing the flexible PCBs with Millmax is: you have to be very precise and careful, and installing and removing the switches is a pain. It is not recommended and overall terrible.
The Bastard Keyboards Hotswap FAQ advises against this approach
I bought three 60 packs of 0305-2 tin Mill-Max Hotswap Sockets from keeb.io (each key requires two sockets and it’s a good idea to have a few extras). After installing all of the SMD components, I installed the sockets. Using a keycap for reference, I determined which holes in the PCB the sockets belonged. Then, I placed the sockets (using tweezers) and taped them in place using clear tape on the keycap side. Finally, I could apply solder on the non-taped side to the protruding socket holding it in place, and then I removed the tape. This approach has no risk of any solder getting inside the socket or the key switch accidentally being soldered in place.
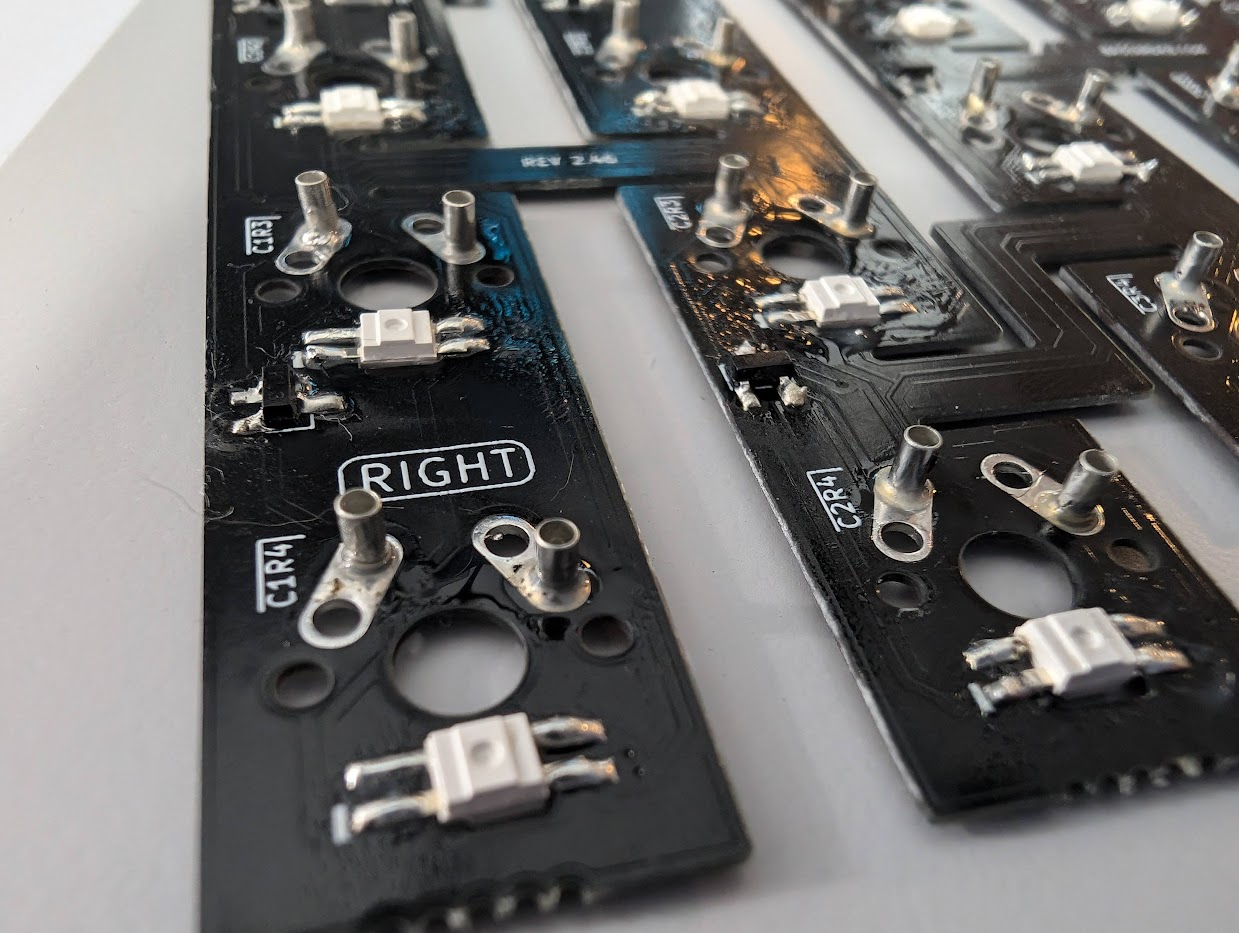
Installing the sockets was the easy part, getting the PCBs to stay in place was the messy part. The Bastard Keyboards instructions cover how the key switches are soldered to the PCBs while the PCB is in the case to hold the board in place, but with sockets, there is nothing to hold the boards in place. Rousslan Dossa used Gorilla tape to hold the PCBs in place for his Mill-Max socketed Charybdis, but I found that to be very difficult to do and not strong enough, so I took a different approach: hot glue.
My Wylderbuilds keyboard is hot glued inside, and I know many other dactyls are hot glued, so I took that approach too, here’s how:
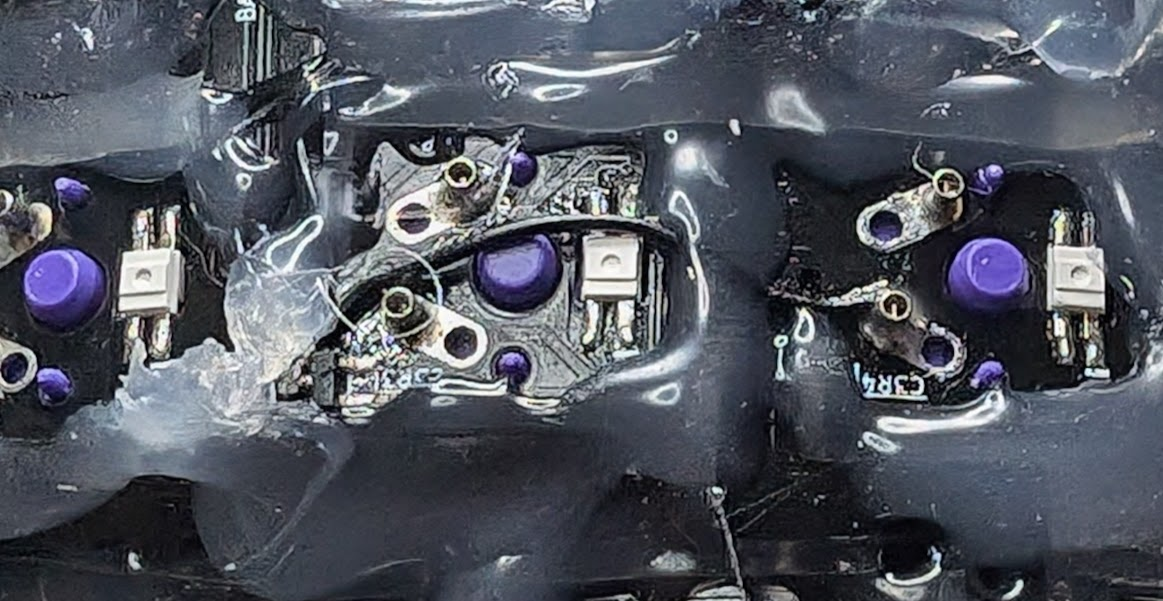
I held the PCB in place in the case and installed each key switch. This step took a lot of time and patience, as switches kept popping out. Once all the switches were in place, I applied copious amounts of hot glue to hold the board to the case, being careful not also to glue the switches to the PCBs.
I repeated this process for all 4 PCBs (two thumbs and two sides).
That was it – making the Charybdis hot swappable wasn’t particularly difficult, just a bit patience-testing, time-consuming, and messy.
Testing, Troubleshooting, and Fixing
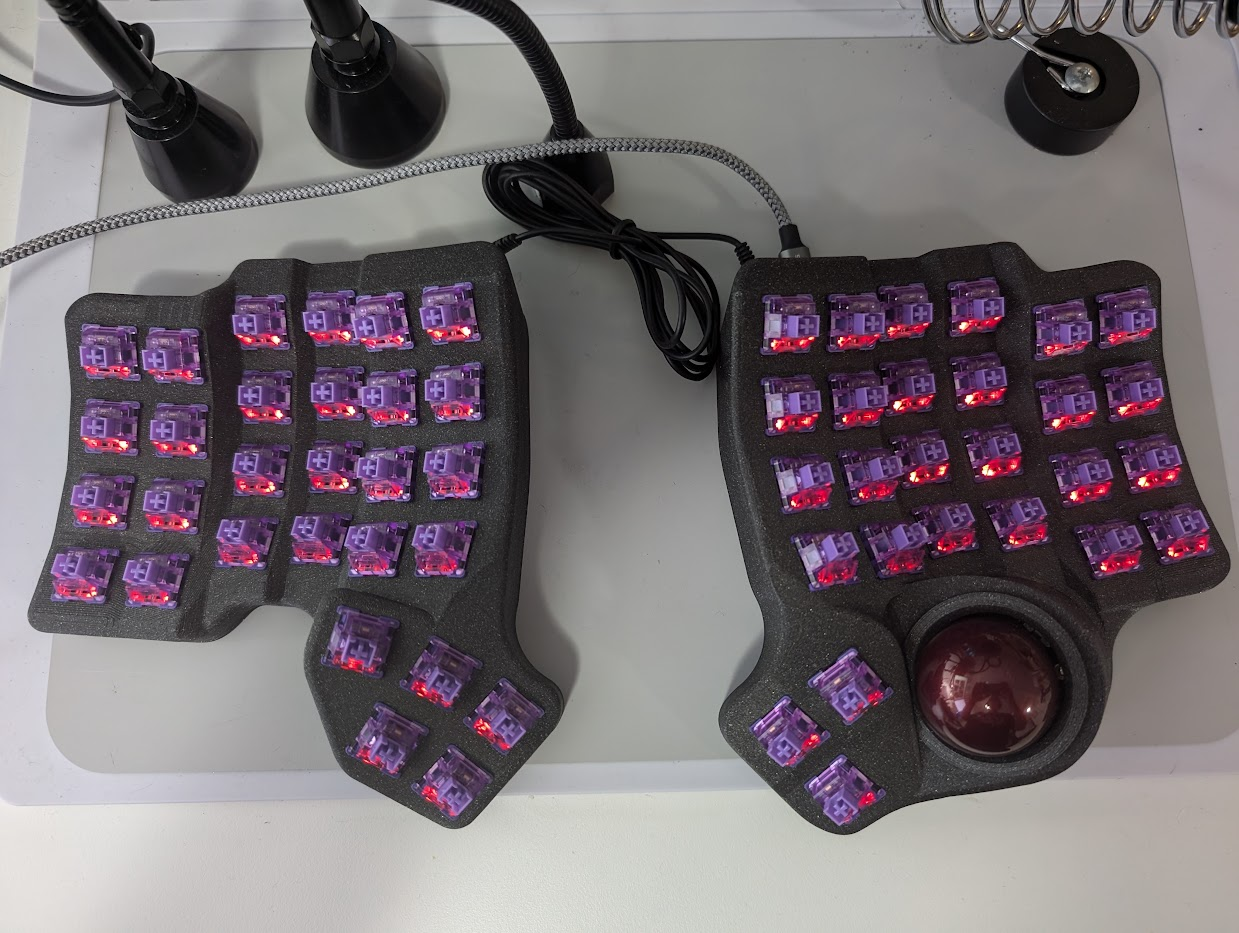
I encountered 3 problems when testing the Charybdis, all on the right side. Remarkably, everything on the left side worked perfectly on the first try.
Keys not working
When I went through the testing procedure from the instructions, I found a few keys didn’t work. Using a multimeter, I discovered 3 broken traces which I worked around by soldering bodge wires in place.
RGB not working at all on the right side
None of the RGB were illuminated on the right side. If some of the lights worked, I knew the problem would be with the connection between the last working LED and the first non-working one. However, with none working, I was a bit concerned so I reached out for help on Bastard Keyboards’ Discord.
By following some helpful tips provided in response to my plea for help, I eventually tracked the issue down to a bad solder connection on the first LED. Reflowing that solder joint solved the problem.
Now half the LEDs worked, but I quickly fixed that by reflowing the solder joints on the first failing LED.
Some of the RGB on the right side is stuck green
Next, I had an interesting problem: four of the LEDs were stuck green.
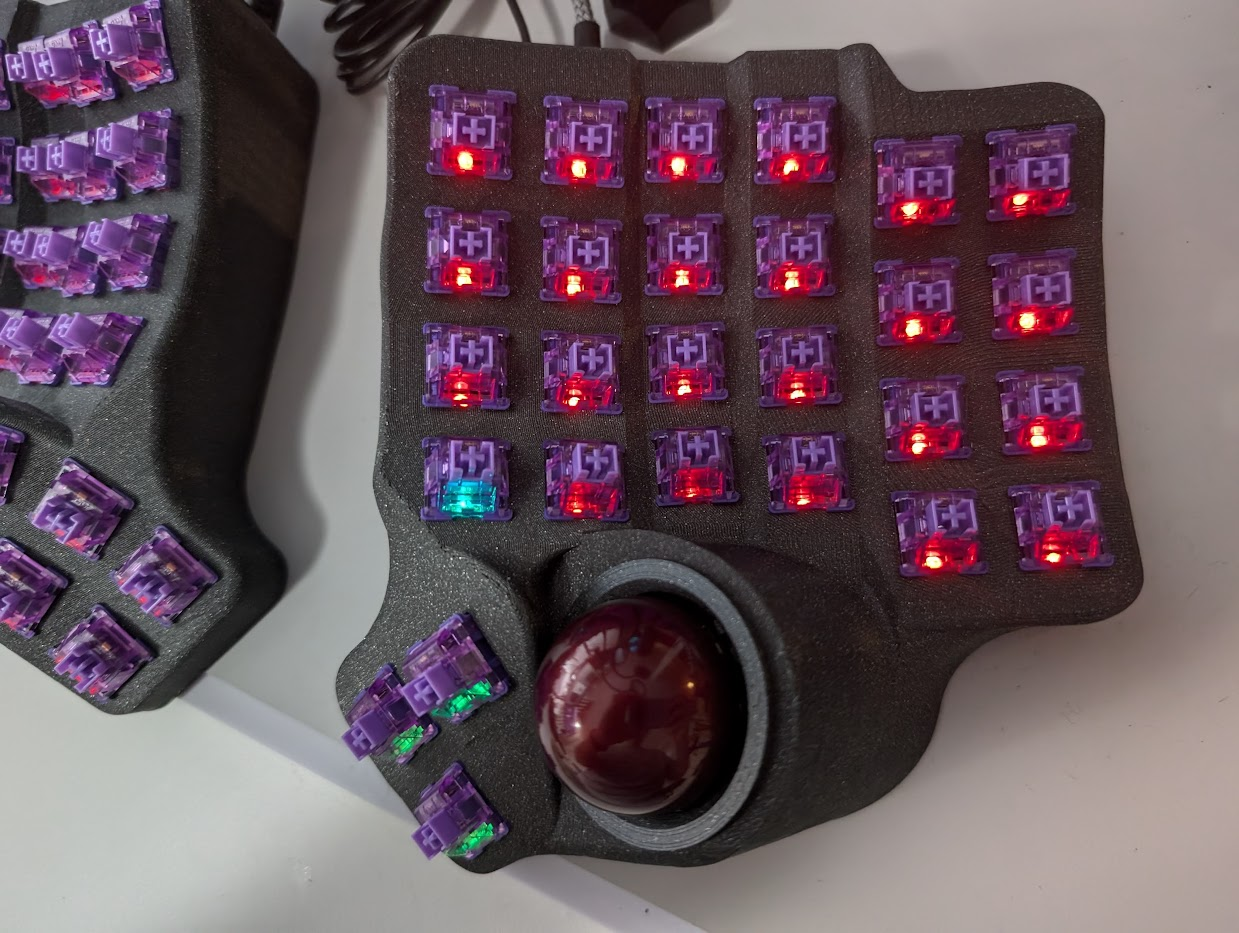
Once again, I reached out for help on Bastard Keyboards’ Discord. Once again, a helpful individual responded and told me to reflow the solder joints on the last working and first failing LEDs, and once again, that action solved the problem.
The Fully Assembled, Fully Functional Keyboard
I estimate that building the keyboard took me about 15 hours. I could do it faster now that I have more experience with the tools and the process.
Charybdis vs My Wylderbuilds Dactyl Manuform
Size is the most obvious difference between the two keyboards. There are other less obvious but equally important differences between them too.
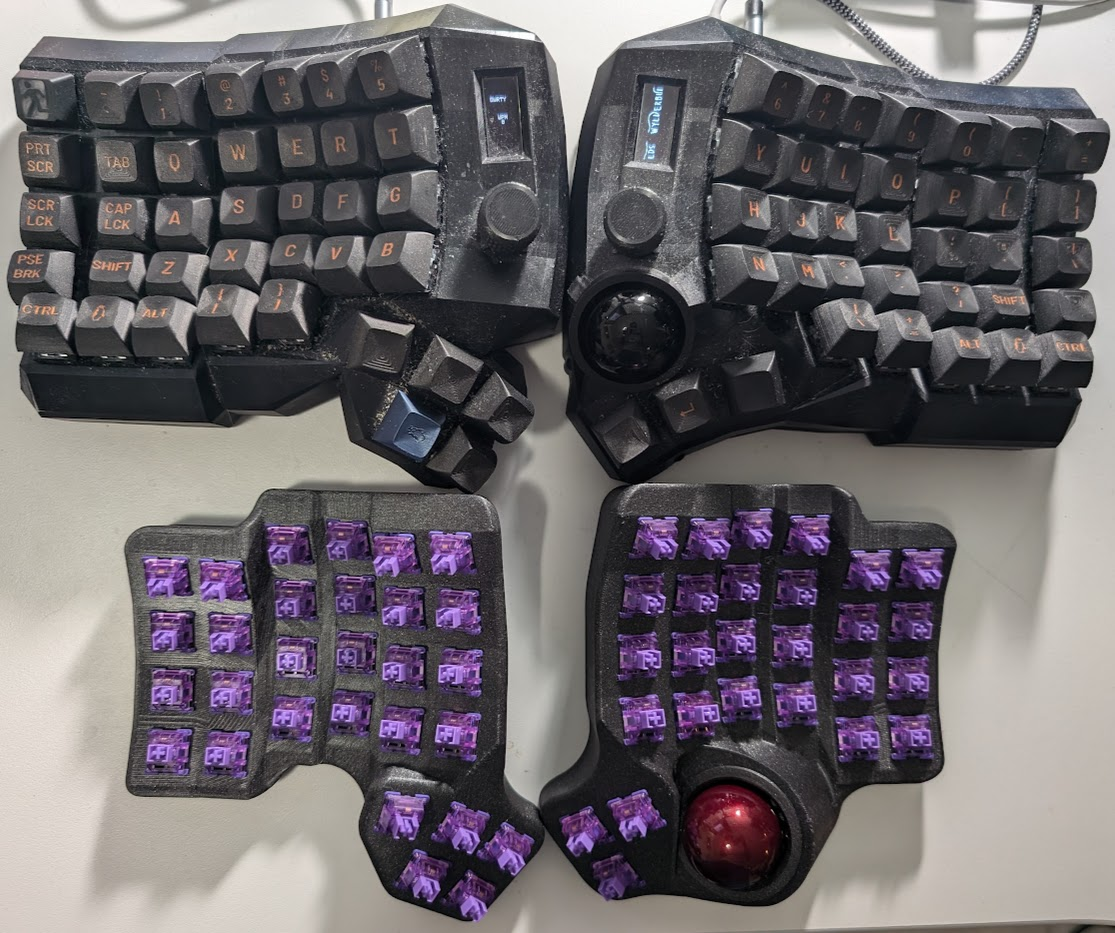
Keys and Screens
I ended up selecting a 5×7 Dactyl Manuform from Wylderbuilds at that time. In my 3 month review of custom Dactyl Manuform Keyboard with Trackball, I noted that the screens aren’t useful, that at least one of the two encoders goes unused, and that there are more keys than I can reasonably reach and use, and therefore having fewer would be better. The Charybdis addresses all those concerns neatly, having 56 keys instead of 72, no screens, and no encoders.
Height
Another characteristic of the Charybdis that I didn’t initially notice but quickly became self-evident was its shorter height. The Charbydis is less vertically thick than my Wylderbuilds keyboard, allowing me to raise my desk and still have my hands in a comfortable position. This reduces the problem I’ve been having whereby my desk is so low that my legs keep bumping it. I didn’t initially consider this characteristic of a keyboard, but I certainly will now and suggest others keep it in mind too.
Trackball Position
The Wylderbuilds keyboard has the Trackball positioned in the sidewall making it easily accessible by the thumb. The vast majority of Dactyl Manuforms that feature trackballs use this position. I’ve found it to be a comfortable, easy-to-use configuration.
The Charybdis is unique, having the trackball under the palm. I believe the palm is the intended primary way to interact with the trackball, with the thumb or fingers being less convenient alternatives.
This positioning is a significant difference. I don’t yet have enough time with the Charybdis to provide an opinion; I’ll revisit this topic in an upcoming article reviewing my impressions of using the keyboard.
USB-C vs TRS for Connecting the Halves
TRS / TRRS has a design problem whereby electrical connectors can and frequently do get connected in ways they shouldn’t when the cable is plugged in or unplugged from the jack. When these shorts happen, they send voltage down data lines and can fry the microcontrollers. TRS was designed in the 19th century, so it can be forgiven for not being designed with sensitive electronics in mind.
I covered this concern in my earlier Looking at Some of the Most Popular Ergonomic, Mechanical Keyboards and Selecting One article. The fact that Wylderbuilds uses USB-C to connect the halves instead of TRS / TRRS was one of the reasons that I selected it.
The Splinktegrated microcontroller included in my kit claims to have additional ESD protection to mitigate this concern, but I’m still nervous. I will be careful to plug or unplug the cable connecting the halves only when the keyboard is not connected via USB. I would urge Bastard Keyboards to update their offerings to use safer, USB-C connections instead of the 19th-century connector they use today.
3D Printed Case / Build Quality
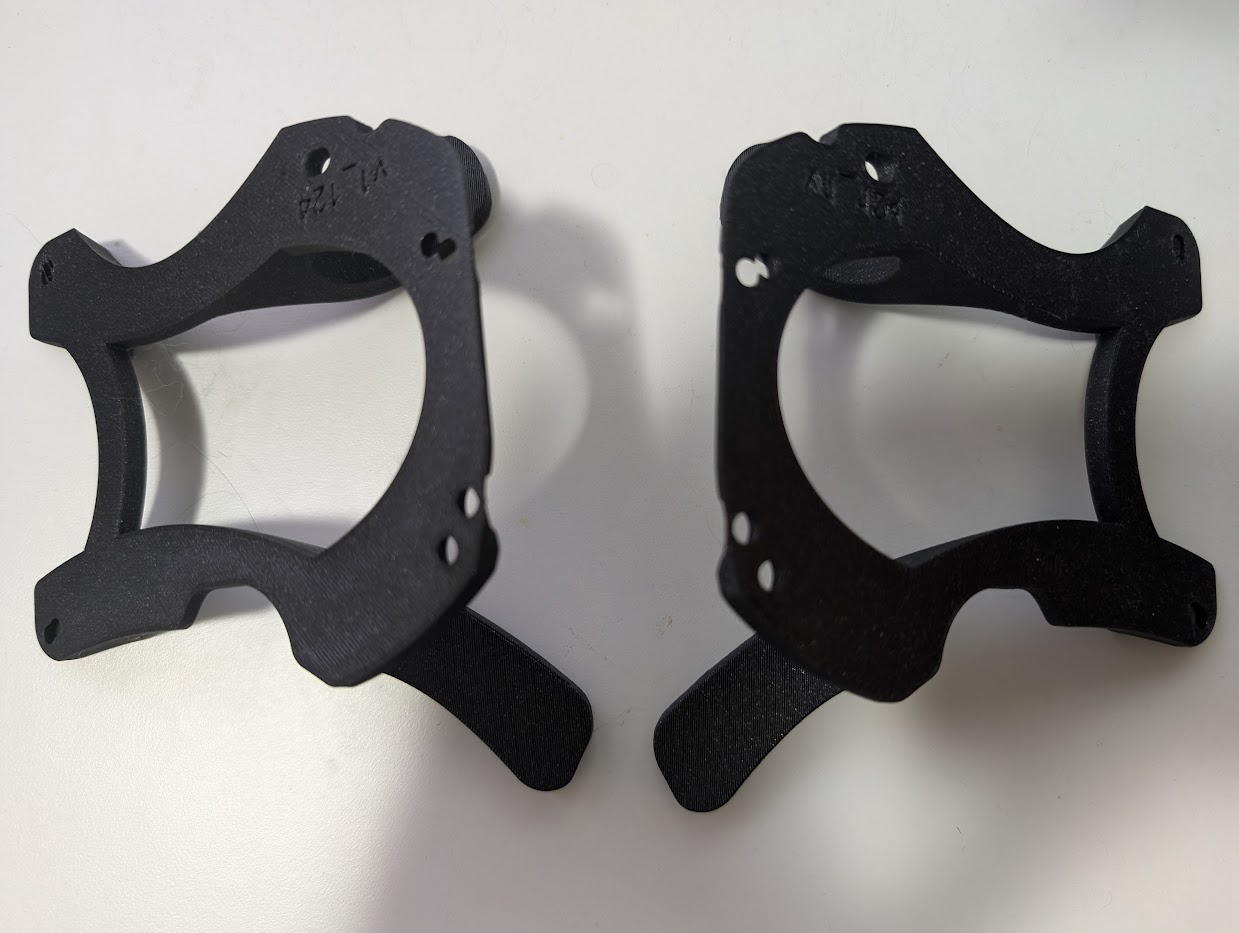
My Wylderbuilds keyboard features a premium 3D printed resin case for which I paid extra. The Charybdis kit offers an FDM printed case so naturally my Wylderbuilds case looks better (except for the part of the Wylderbuilds case that is damaged). However, I think the Charybis case still looks great. Bastard Keyboards uses a black filament with glitter, Prusament Galaxy Black. This texture hides the layer lines well and provides some nice visual interest. I wish the 3D printing had been done with a lower layer height to reduce the appearance of layer lines. However, the layer lines are only prominent between the key switch holes but are hidden when keycaps are installed. Overall, I think the Charybdis case is of good quality and acceptable appearance. If you want something higher quality or more unique, Bastard Keyboards offers case models on GitHub so you can print the case yourself or order it to be printed by a third party. And if you contact Bastard Keyboards on Discord, they may be able to produce a custom case to your specifications too.
Final Thoughts
I’ve never done a project like this one before. The thought of doing this much soldering (Charybdis with RGB has over 300 solder joints plus 112 more for the hotswap Mill-Max sockets) was overwhelming. For a long time, I avoided these kinds of projects, such as by previously only considering prebuilt keyboards. But now that I’ve done this project, I’m glad to have done so.
Assembling this keyboard was challenging but also rewarding. Stepping outside my comfort zone, learning new skills, and working with hardware instead of software has been fun. This exercise afforded me a great sense of accomplishment.
In retrospect, this project wasn’t difficult. I’d say it’s analogous to a jigsaw puzzle with lots of pieces – they’re not difficult per se, but they are challenging. With that understanding, I wholeheartedly recommend others embark on this journey.
Regarding the keyboard, the instructions were great and the hardware seems good. Next up will be to use the keyboard. I look forward to next sharing my thoughts on using the keyboard specifically with regards to the key layout, trackball position, and tenting.
![]() Building the Charybdis – A Split Ergomechanical Keyboard with Trackball by Craig Andrews is licensed under a Creative Commons Attribution-ShareAlike 4.0 International License.
Building the Charybdis – A Split Ergomechanical Keyboard with Trackball by Craig Andrews is licensed under a Creative Commons Attribution-ShareAlike 4.0 International License.