AWS recently enhanced its Systems Manager offering with shell access to EC2 instances and then they enhanced it further with SSH tunnel support. With these improvements, it’s now possible to improve your application’s security posture while reducing it’s operational costs and simplifying setup/maintenance.
Systems Manager vs Bastion Hosts
Minimizing the attack surface, simplifying as much as possible, not sharing credentials, and having audit trails are key facets of information security. The classic approach to providing access for authorized personnel (such as system administrators, database administrators, sometimes developers) to AWS resources is by setting up a bastion host (sometimes called a “jump box”) which acts as a gateway to other AWS resources. This approach has significant disadvantages:
- The bastion hosts represents an additional attack surface. The surface can be minimized by using networking restrictions (such as NACLs and security group rules to limit access to a trusted IP address range), but no matter what, the surface is still larger than just the application.
- The bastion host is additional complexity beyond just the application. It has to be set up, secured, audited, updated, and maintained. There’s a non-zero risk that in this work, a mistake can be made opening a vulnerability.
- Authorized users have to have credentials to access the bastion host. Oftentimes, because AWS allows only a single SSH secret key to be associated with an EC2 instance, multiple users will each get a copy of and use the same SSH key. This credential sharing is far from best practice, eliminating non-repudiation: now it’s impossible to tell from the logs who did what. Alternatively, either manually or through automation such as Ansible, keys can be created and managed for each user. However, that contributes greatly to cost and complexity.
- Audit trails are not automatically generated using the basic configuration of bastion hosts. To generate audit trails, CloudWatch Logs has to be configured and the bastion host has to be configured to send logs (such as /var/log/secure) to CloudWatch Logs. Even then, the individual commands run are not logged; additional work (again using Ansible or some other automation system) has to be done to get that level of detail.
- The bastion host also has a cost associated with it as it is a running EC2 instance. Even a t2.micro costs about $10/month. If a larger instance if used to support more users, many bastions are used across many applications, or multiple availability zone redundancy is needed, the cost of bastion hosts can climb quickly.
AWS’s new SSM features solve all of these problems.
- SSM is part of AWS, so there is nothing exposed. It has no additional attack surface beyond the existing use of AWS.
- In terms of complexity, SSM is easier to enable than setting up a bastion host. There are no SSH keys to manage and no additional credentials to create (it uses AWS IAM credentials that authorized users would already have). In summary, additional IAM roles must be added to the instance profiles of the EC2 instances that users will access via SSM, the SSM service has to be installed on the EC2 instances (the most common Amazon Linux AMIs have it pre-installed), and standard IAM rules should be used to grant SSM access to users who should have it.
- In terms of credentials, users use their existing AWS IAM credentials. That means any IAM polices apply, including Single Sign On (SSO), password rotation, multi-factor authentication (MFA), etc. Non-repudiation is in effect.
- Because it is part of AWS, AWS SSM logs to AWS CloudTrail.
Setting up Systems Manager
So how do you get rid of that bastion in favor of using SSM? I recently introduced SSM support into VersionPress On AWS (which I’ll use as an example here) as well client projects. The process is to configure the EC2 instance to be able to communicate with SSM; the following details how to do that stand alone EC2 instances as well as ones managed by Elastic Beanstalk.
Enabling EC2 Instances to use SSM
For EC2 instances, create a new Instance Profile pointing to a new IAM role that includes the AmazonSSMManagedInstanceCore policy. This allows the EC2 instance to communicate with SSM. In CloudFormation json:
"EC2IamRole": {
	"Type" : "AWS::IAM::Role",
	"Properties" : {
		"AssumeRolePolicyDocument": {
			"Version" : "2012-10-17",
			"Statement": [ {
				"Effect": "Allow",
				"Principal": {
				"Service": [ "ec2.amazonaws.com" ]
			},
			"Action": [ "sts:AssumeRole" ]
			} ]
		},
		"ManagedPolicyArns" : [
			"arn:aws:iam::aws:policy/AmazonSSMManagedInstanceCore",
			"arn:aws:iam::aws:policy/CloudWatchAgentServerPolicy"
		]
	}
},
"EC2IamInstanceProfile": {
	"Type" : "AWS::IAM::InstanceProfile",
	"Properties" : {
		"Roles" : [
			{
				"Ref": "EC2IamRole"
			}
		]
	}
}
CloudWatchAgentServerPolicy is not strictly required, but it’s generally a good idea to allow EC2s to log to CloudWatch. Add any other roles as desired, of course.
For the EC2, in its properties, set IamInstanceProfile to EC2IamInstanceProfile:
"EC2Host": {
	"Type": "AWS::EC2::Instance",
	"Properties": {
		"IamInstanceProfile":{
			"Ref": "BastionIamInstanceProfile"
		}
	}
}
If you’re using an Amazon Linux AMI base AMIs dated 2017.09 or later or an Amazon Linux 2 AMI, then you’re done unless you want to make sure the latest version of the SSM agent gets installed. Otherwise, you need to install the SSM agent. Here’s how to do that using CloudFormation with EC2 user data assuming an Amazon Linux 1 or 2 AMI is used:
"EC2Host": {
	"Properties": {
		"UserData": {
			"Fn::Base64": {
				"Fn::Join": [
					"\n",
					[
						"#cloud-config",
						"",
						"runcmd:",
						{ "Fn::Sub" : "  - yum -y localinstall https://s3.${AWS::Region}.amazonaws.com/amazon-ssm-${AWS::Region}/latest/linux_amd64/amazon-ssm-agent.rpm" }
					]
				]
			}
		}
	}
}
Further instructions, including for other operations systems, is covered in the AWS documentation.
That’s it for EC2.
Enabling Beanstalk Instances to use SSM
For Elastic Beanstalk, the process is very similar to standalone EC2 instances. Create a new Instance Profile pointing to a new IAM role that includes the AmazonSSMManagedInstanceCore policy. In CloudFormation json:
"BeanstalkInstanceIamRole": {
	"Type" : "AWS::IAM::Role",
	"Properties" : {
		"AssumeRolePolicyDocument": {
			"Version" : "2012-10-17",
			"Statement": [ {
				"Effect": "Allow",
				"Principal": {
				"Service": [ "ec2.amazonaws.com" ]
			},
			"Action": [ "sts:AssumeRole" ]
			} ]
		},
		"ManagedPolicyArns" : [
			"arn:aws:iam::aws:policy/AmazonSSMManagedInstanceCore",
			"arn:aws:iam::aws:policy/AWSElasticBeanstalkWebTier"
		]
	}
},
"BeanstalkInstanceIamInstanceProfile": {
	"Type" : "AWS::IAM::InstanceProfile",
	"Properties" : {
		"Roles" : [
			{
				"Ref": "BeanstalkInstanceIamRole"
			}
		]
	}
}
For the Beanstalk Environment, in its properties, in the namespace aws:autoscaling:launchconfiguration set IamInstanceProfile to BeanstalkInstanceIamInstanceProfile:
"BeanstalkEnvironment": {
	"Type": "AWS::ElasticBeanstalk::Environment",
	"Properties": {
		"OptionSettings": [
			{
				"Namespace": "aws:autoscaling:launchconfiguration",
				"OptionName": "IamInstanceProfile",
				"Value":
					{
						"Ref": "BeanstalkInstanceIamInstanceProfile"
					}
			}
		]
	}
}
If you’re using an Amazon Linux AMI base AMIs dated 2017.09 or later or an Amazon Linux 2 AMI, then you’re done. Otherwise, you need to install the SSM agent. Create an ebextension (named, for example, ssm-agent.config) like this to do so:
---
commands:
  01_install_amazon_ssm_agent:
    command: 'yum -y localinstall https://s3.`{ "Ref" : "AWS::Region"}`.amazonaws.com/amazon-ssm-`{ "Ref" : "AWS::Region"}`/latest/linux_amd64/amazon-ssm-agent.rpm'
That’s it – the Beanstalk managed EC2 instances should now be visible to SSM.
Using the SSM Console to Connect to Instances
The SSM Console allow you to connect to EC2 instances from the browser – there is no client software (other than the browser) involved. This eliminates the need to worry about SSH clients and firewalls.
To start a session, from the SSM console, go to Session Manager.
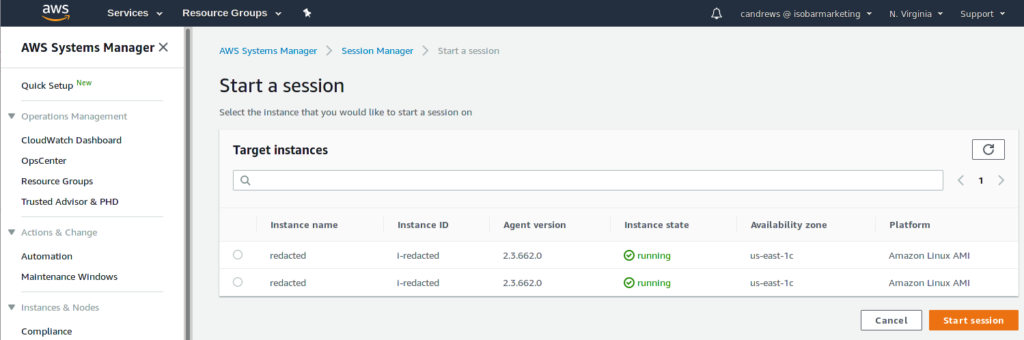
Select the desired instance and click “Start Session”. The result is a shell in your browser.

Use an SSH Client to Connect to Instances Including File Transfers and Port Forwarding
The browser based access is nice, but it doesn’t allow for file transfers or port forwarding. To be able to do that, SSM supports SSH connections. To set that up:
- Install AWS CLI version 1.16.12 or later
- Install the Session Manager Plugin for the AWS CLI
- Enable SSH Connections Through Session Manager by editing
.ssh/configso ssh connection to i-* and m-* go through SSM. - Instead of using the
ProxyCommandsuggested, download aws-ssm-ec2-proxy-command.sh to~/.sshand make it executable, then use thisProxyCommandin~/.ssh/config:ProxyCommand ~/.ssh/aws-ssm-ec2-proxy-command.sh %h %r %p
Now instead of having to configure SSH keys on each EC2 you connect to, your key will automatically be copied to the EC2 and removed after 10 seconds, allowing you to SSH to any EC2 without having to worry about configuring SSH key.
With that setup in place, ssh to any SSH registered EC2 instance by running:
ssh ec2-user@i-012345679
Port forwarding also works. For example, I set up a tunnel to my RDS instance so I can use SQuirreL SQL to query my RDS database like this:
ssh ec2-user@i-012345679 -A -L5432:production-env-db.c5nl5xt26oh8.us-east-1.rds.amazonaws.com:5432
Finally, scp and sftp work for copying files both to and from EC2 instances:
scp myfile ec2-user@i-012345679:
Conclusion
Bastion hosts were a good solution, but now there is a better solution.
And it’s not just AWS that’s offering better alternatives to bastion hosts; Microsoft offers Azure Bastion which closely mirror’s AWS’s Systems Manager Session Manager.
![]() Improve Security and Reduce Costs with AWS SSM Session Manager by Craig Andrews is licensed under a Creative Commons Attribution-ShareAlike 4.0 International License.
Improve Security and Reduce Costs with AWS SSM Session Manager by Craig Andrews is licensed under a Creative Commons Attribution-ShareAlike 4.0 International License.